


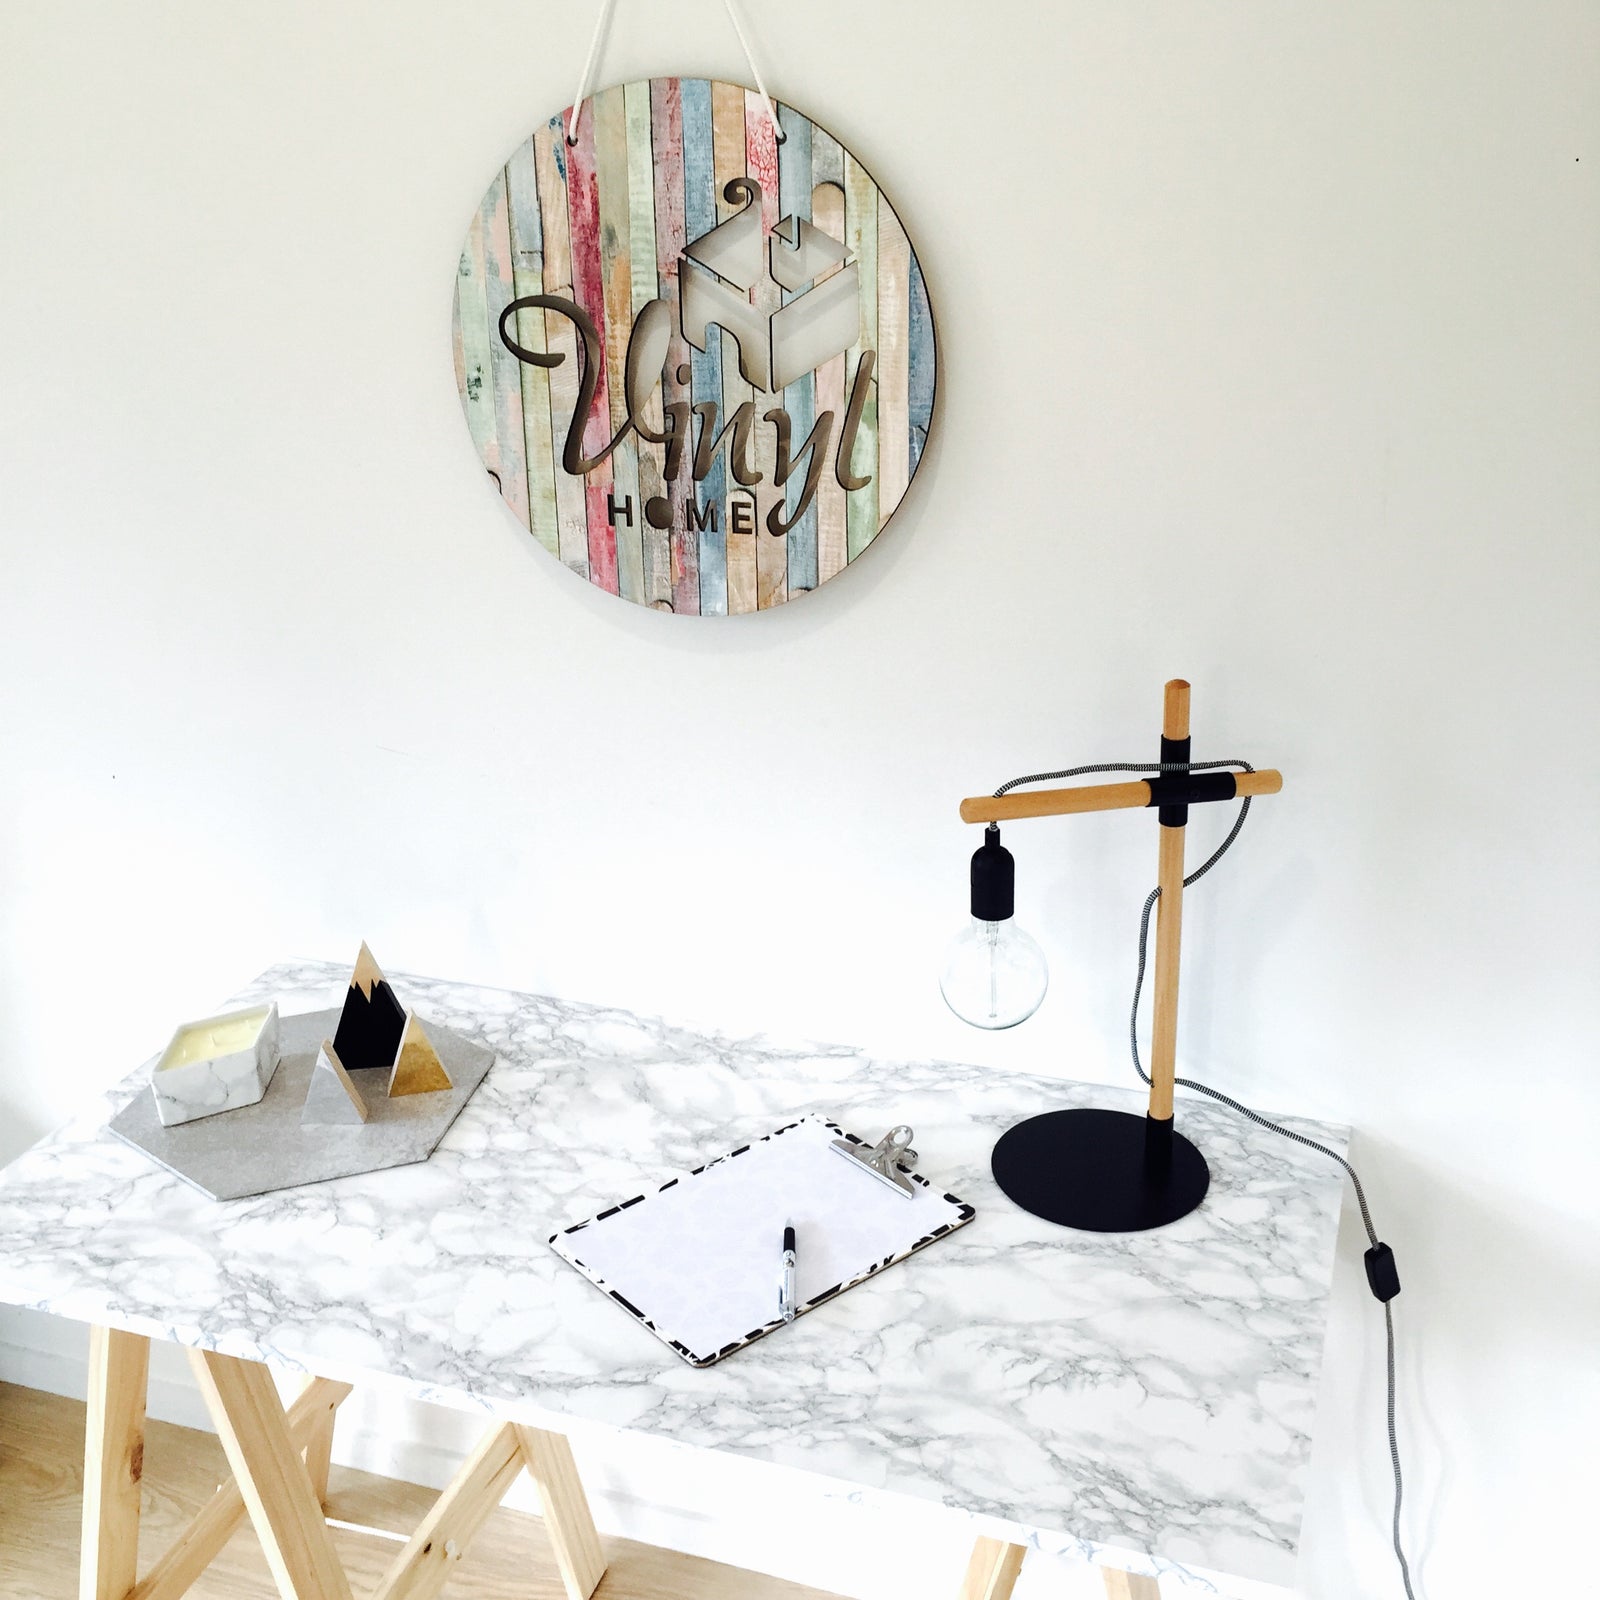

A trestle table is always a winning concept when it comes to furniture. It's easy to create, take with you and has a diversity of uses. They can be used as a desk, extra bench top or as a serving/display table to name a few. I will show you how you can create yourself a stylish marble trestle table for less than $90. As a bonus I'll also show you how you can add an extra feature to your table that surely will allow for hours of fun.
How to create trestles
A trestle table consist of two trestles and a top. For each trestle you will need:
- 4 x timber legs
- 4 x timber rails
- 2 x hinges
- 50cm rope
- screws
(make sure you take this list times two)

I used 1.2m standard untreated timber and asked the guys at the local hardware store to cut them at 74cm. This length became legs (for a standard 75cm high desk) and the off cuts the rails.
1. Position one rail on top of the leg corners and the other about 20cm up from the bottom of the legs. Drill holes before fastening the screws to avoid the timber from cracking. Start with the screws on the outside.
2. Leave the second screw until you have fasten all outer screws.
3. Make sure everything is in a 90° angle.
4. Fasten all the screws on the inside.

5. Position the top of the legs as close together as possible and make sure they are lined up. Fasten the hinges and make sure that they are in the centre.
6. Drill a hole in the centre of the lower rails and attach a rope. Make sure that the trestle is about 40cm wide when fully opened.
7. Tie a knot on the rope, cut and seal it with fire.
8. Repeat all steps above and you will have your two trestles completed.

How to cover a trestle table top in marble vinyl
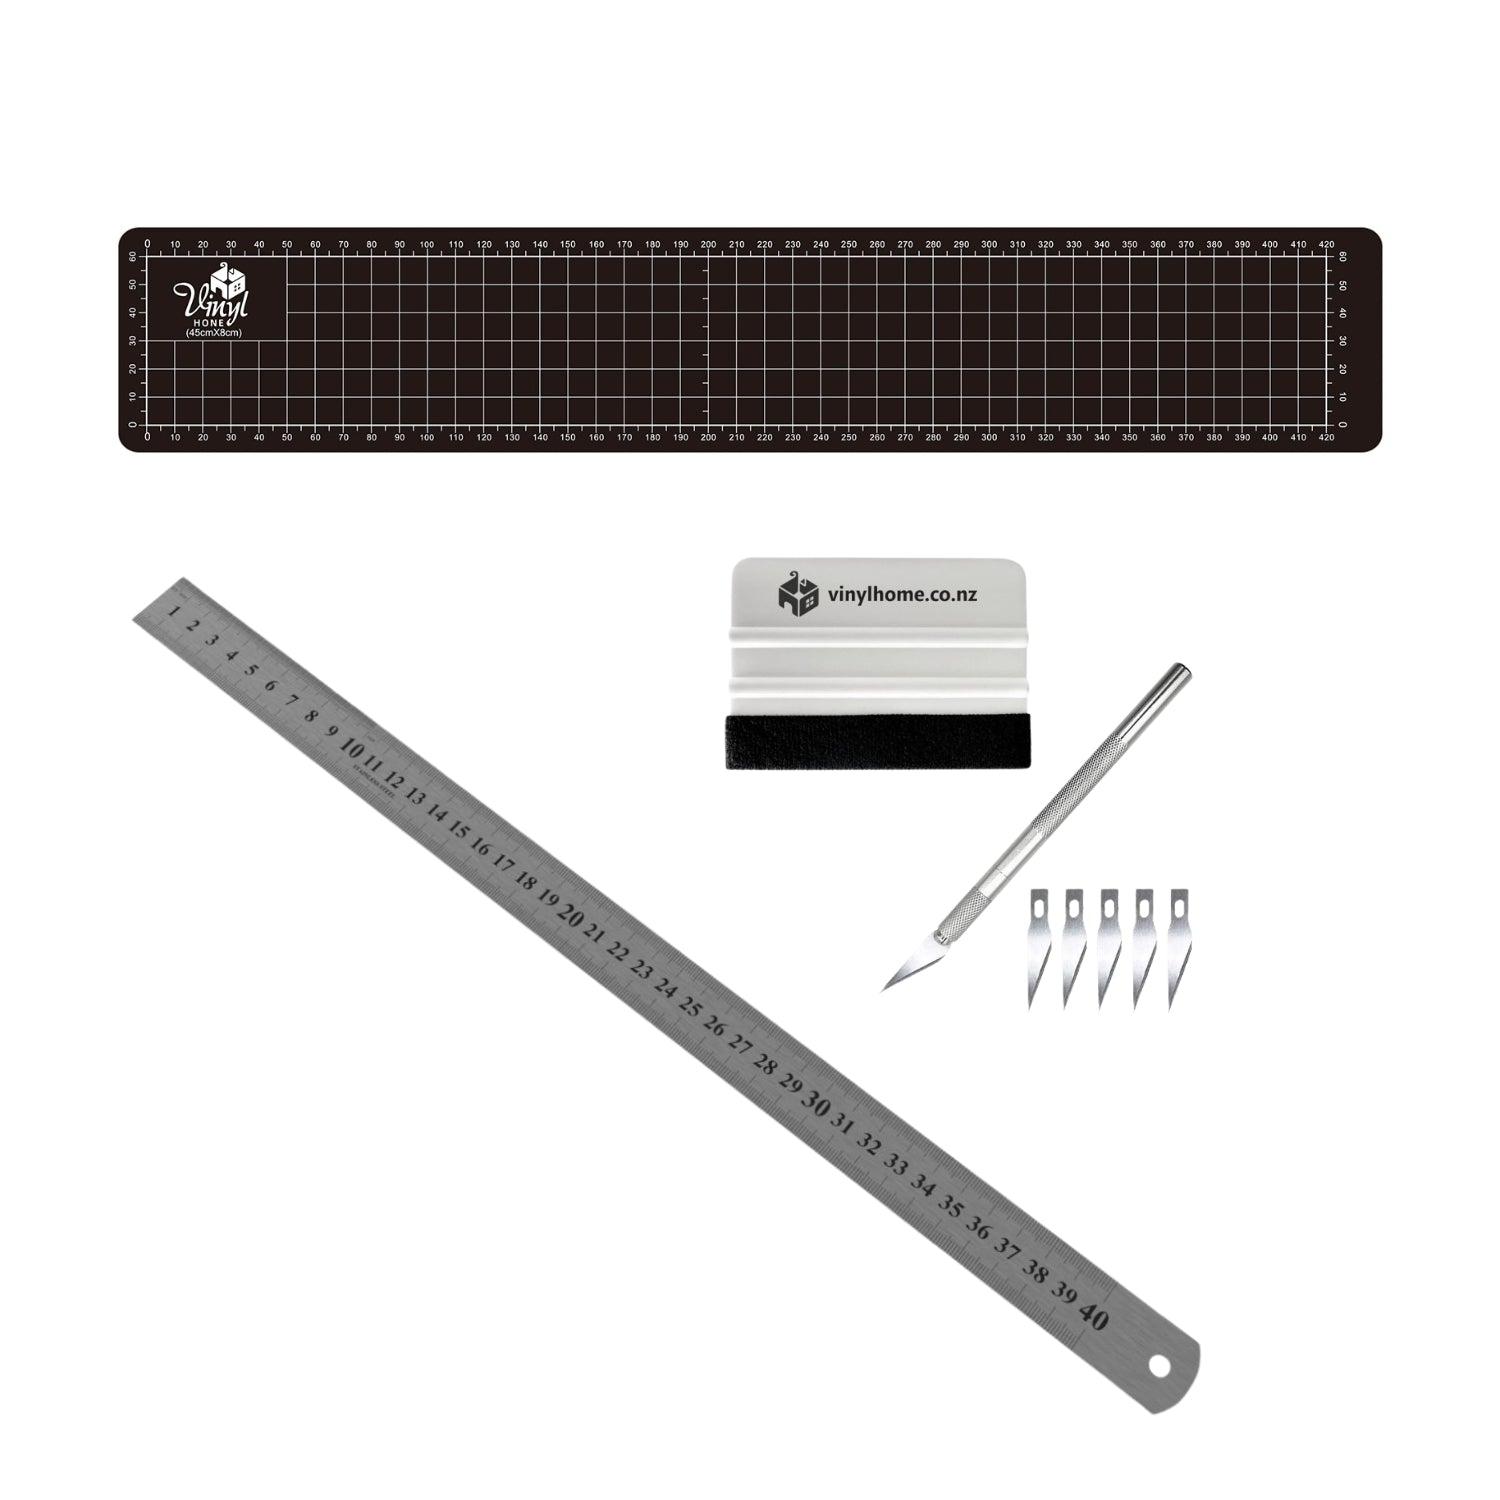
The next step in creating your marble trestle table is to cover the table top. To do this you will need:
- 1 x large board (mdf, door, bench top or similar)
- Marble vinyl
It is preferable to know the width of the vinyl you will use before you source the trestle table top. I wanted to use a 67.5cm wide marble marmi grey pattern, which is ideal for covering boards that are 60cm wide. Hardware stores have normally got off cuts of all sorts of timber and I managed to score a thick mdf board that was 60 x 120cm for next to nothing.
1.Cut the vinyl to size so that you have enough to cover all the edges and to wrap it underneath at least 1cm. Position the contact paper on top of the table top and fold back a few cm of the backing paper on one of the short ends. Ask a friend or family member to hold the vinyl when you do this or put something heavy on top to keep the vinyl still.
2. Gently smooth down the self-adhesive vinyl with a squeegee while you slowly pull the backing paper with your other hand. The trick is to go slowly. If you get a bubble/wrinkle, simply go back. The vinyl is repositionable during application and it takes up to a week until it fully sets.
3. Fold down the vinyl over the short ends and make a cut by following the contour of the corner.
4. Don't worry if the cut isn't completely straight towards the end.

5. Fold up the short ends again as now it's time to work on the long ends. If the edges is less than 5cm thick, the vinyl may struggle to adhere (because it takes some time for the glue to kick in). A handy trick to speed up this process is to warm the contact paper with a hair dryer. Make sure you point the hair dryer away from the vinyl that you've already covered to avoid bubbles being created from the heat.
6. Gently pull and smooth down the sticky back plastic with your fingers and work your way from the centre towards the edges.
7. Go over the surface again with a squeegee and make sure there are no bubble left and that the vinyl has attached to the surface.
8. Fold the edges around the corner where you previously made the cut. The short ends will later create an overlap here to make sure the vinyl is properly sealed and that your corners won't have gaps.

9. Make a cut on the short end by following the contour underneath the table top.
10. Repeat the process on the other long end and then flip the table top over.
11. Fold down the marble vinyl on the backside. Again use a hair dryer to make sure it's properly attached to the surface (especially if you are using an mdf board).
12. Cut off excess vinyl on the piece you just folded down by following the contour of the edge.

13. Now you only have the short ends left. Flip back the table top so that the marble vinyl is facing upwards again.
14. Use the hair dryer and smooth down the vinyl so it adheres to the edge.
15. You have now created an overlap in the corner. Repeat this on the other short end and flip the table top over again.
16. Smooth down the rest of the vinyl on the backside and cut off any excess vinyl by following the contour of the edge.

How to create a multifunctional table
You could have been ready here and had the perfect Marble trestle table for less than $90. What I'll show you know will give you an extra functionality and this is just by adding $23 (price based on quantity used for this table).

To make your table more multifunctional you will need:
- bumper dots
- self adhesive white board film
You might have guessed it now. The extra feature we are going to create is a whiteboard table on the reverse side.
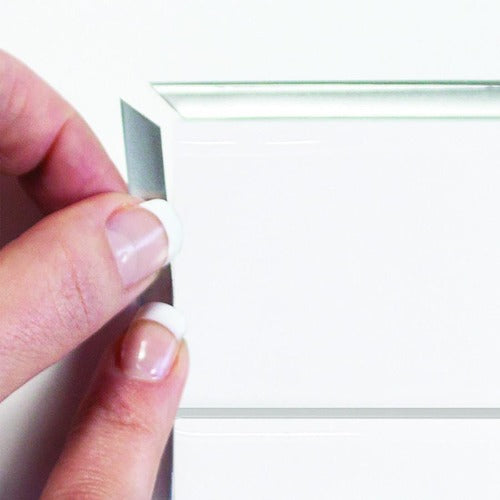
17. Sand the timber edges and attached safety dots on the wood to make sure that the hinges and timber won't leave any scratches on the vinyl.
18. Cut out whiteboard film with an overhang of 1cm of all the edges of the trestle table top. Apply the whiteboard film just like you did with the self adhesive marble vinyl. (Step 1 and 2)
19. Cut off excess vinyl with a sharp knife by holding it on a slight angel and follow the contour of the table.
20. Be creative with your new multifunctional marble and whiteboard trestle table!

Thank you for stopping by! Please post a comment below and tell me what you will use your trestle table for.