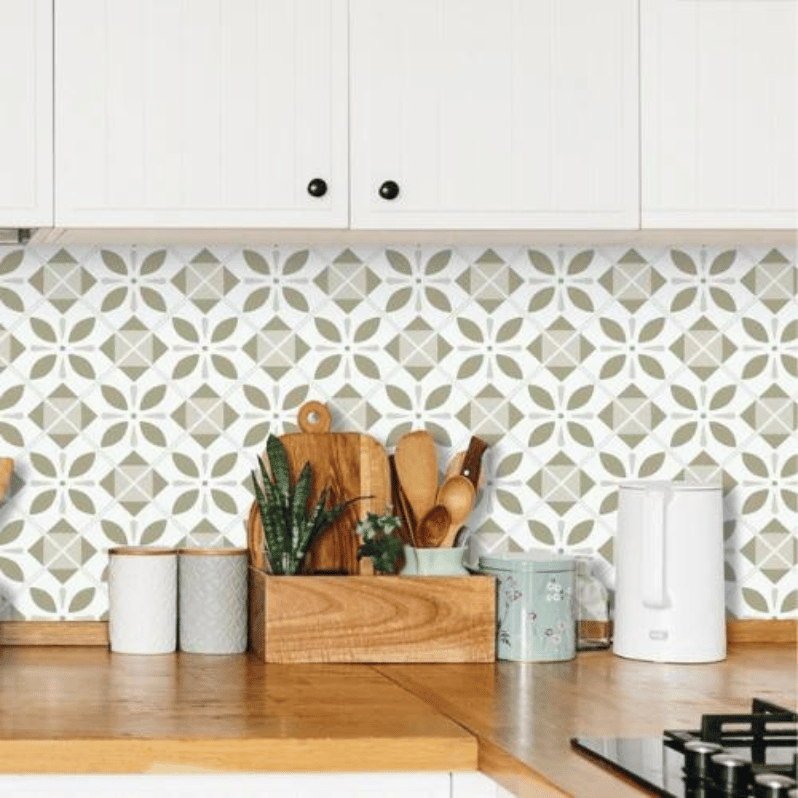


Make your home away from home look even better and more luxurious with 3D sticky-back tiles, creating your dream caravan for every holiday.
Caravans do not come with fancy tiled splashbacks that look as good as in your home. Tilers will most likely not recommend you to install any ceramic type of tiles in your motorhome, since they would not survive the journey to its holiday destination. Our wall Smart Tiles can easily be installed to most flat surfaces, including your caravan, withstanding all shakes and movements and still present you the look that you desire.
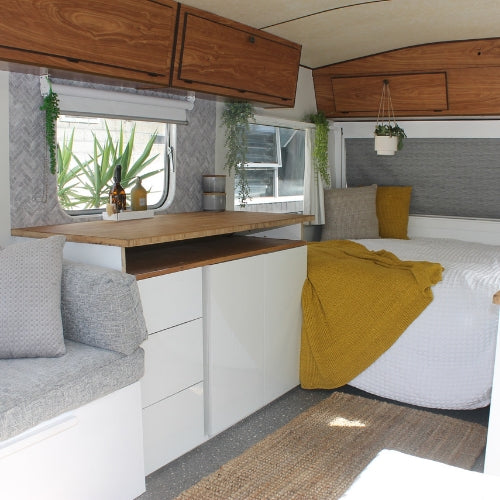
We have upgraded a 30 year old caravan with our self-adhesive tiles and styled it in earthy tones to match the original cupboards. Below is a step by step guide on how to install peel and stick tiles (for full video tutorial scroll to end of the blog).
Not sold yet? Here are some more reasons why you should Do It Yourself
- Our tutorials are easy to follow
- The makeover can be done on a budget
- The installation will only take an afternoon
- No grout is required
- The tiles are lightweight
Make your caravan look fresh and modern!

You will need:
- Our sticky back tiles
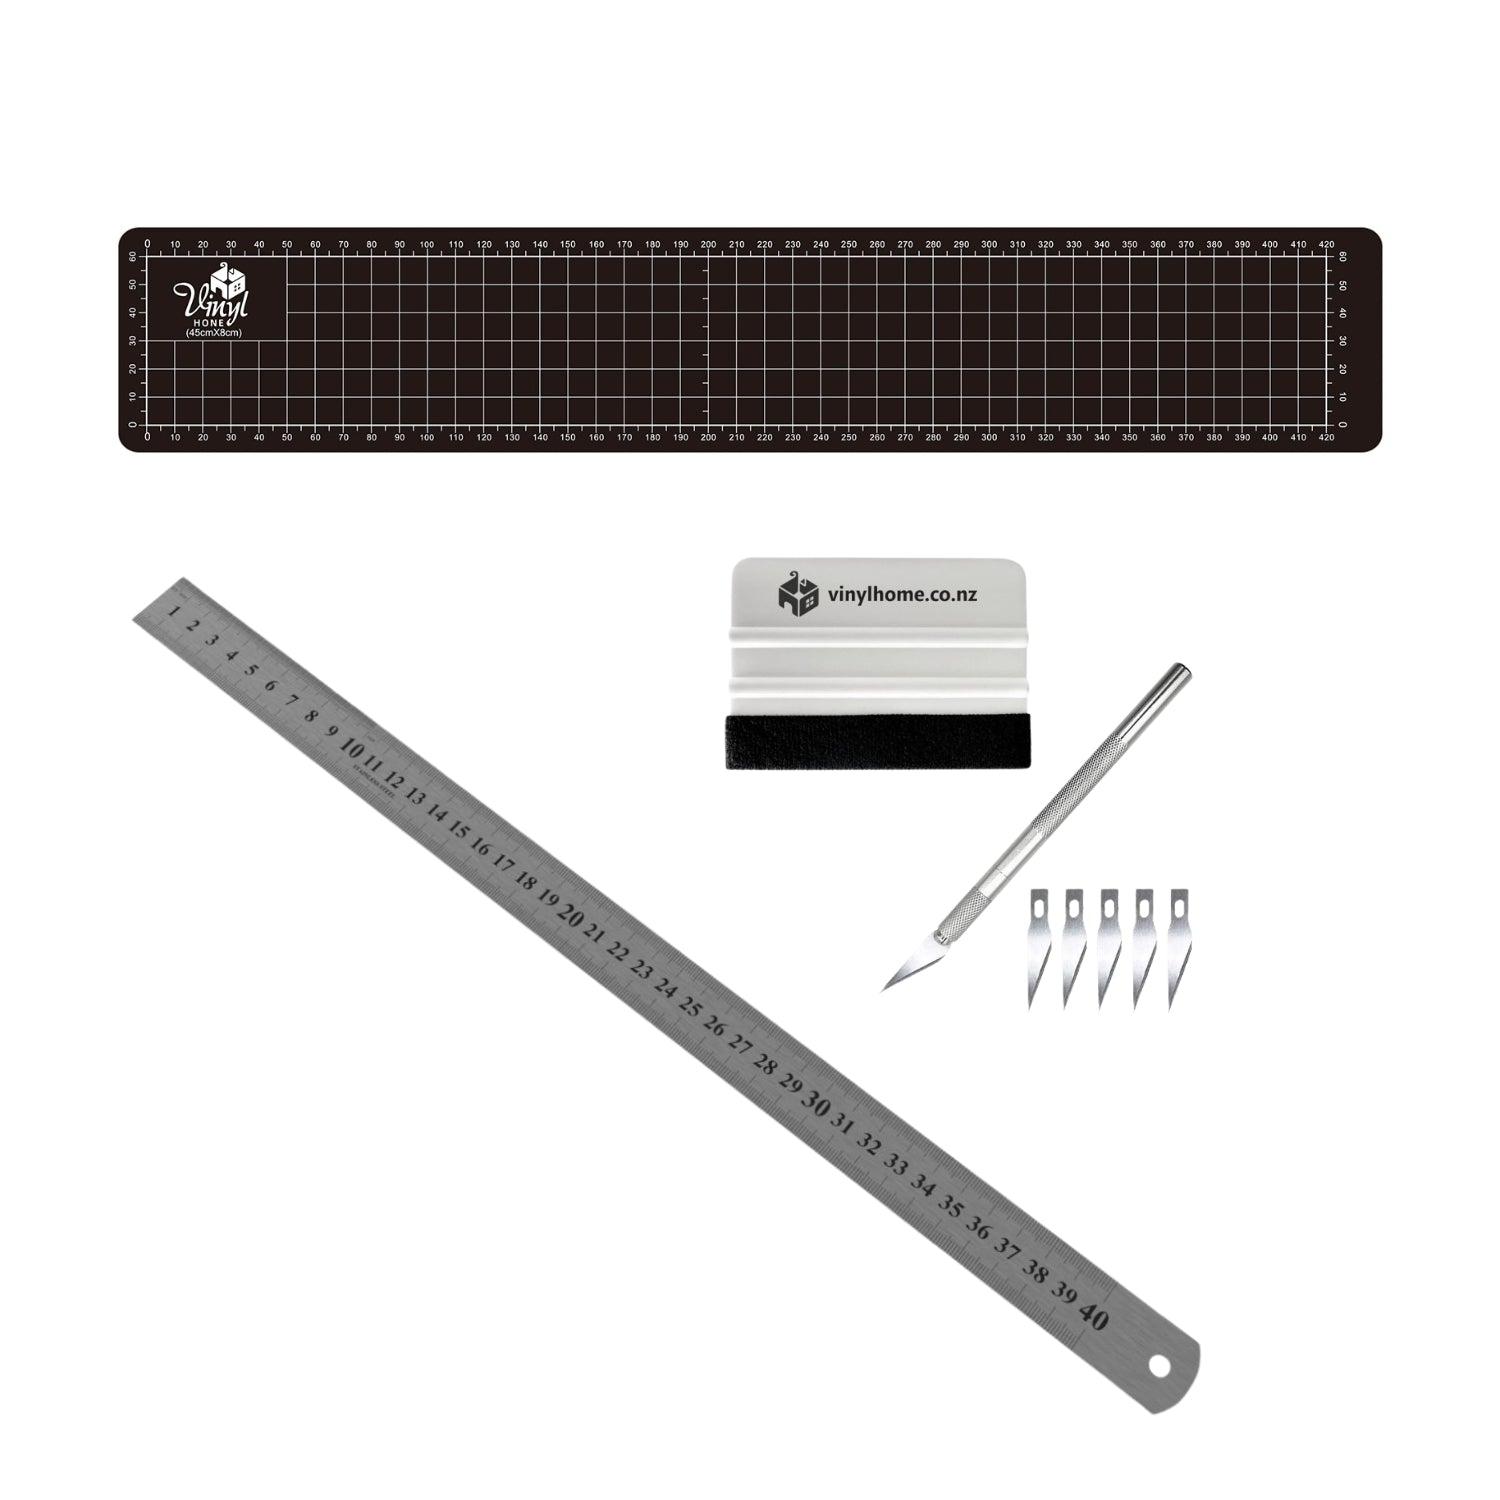
- Measuring tape and pen
- Craft knife and craft mat
- Level or plain
- A little bit of patience, it can be a bit fiddly in some places but it will be worth it!
Installation Instructions:
Step 1. Select your tiles
Measure the space where you intend to install the tiles. Order the style of self-adhesive tiles you want and the quantity you require here.
Step 2. Get an idea of the layout
Lay out the tiles in front of the area you are planning to cover. This will get you an idea of how to cut your tiles. It is especially important when you have obstacles like windows and powerpoints to work around.

Tip: Use a plain or a spirit level and draw a line as a guide for your tiles to make sure that they are applied straight and you don’t end up with a crooked finish.

Step 3. Apply the first sheet of tiles
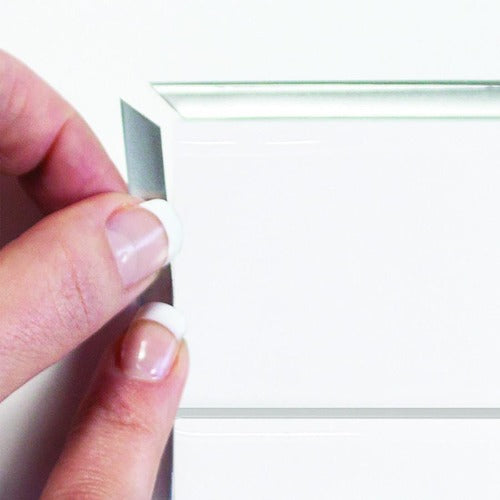
Start in one of the corners and cut the first sheet of tiles to the size and shape you need. For this design, the first side and bottom edge need to be cut to achieve a straight finish.
Apply the tiles by pulling one bit of the backing-paper away at the time. This will prevent the whole sheet to stick to the wall and you can work more precisely. Smooth it all down with your hand to prevent air bubbles underneath.


Step 4: Attach the second sheet of tiles by overlapping the grouts
Measure and cut off the bottom edge of the second sheet. Hold it next to the just applied one. Make sure to pay attention to the grout. For the best finish, the grout part of the sheet should fully overlap (like a jigsaw puzzle!). This requires you to work accurately, especially if you have chosen a detailed pattern like we have with the Cortina Grigio Tiles.
You will get the hang of it quickly.

Tip: If you have to cut off small excess pieces, it is sometimes easier to do so after the tiles have been applied to the wall. Slowly run your craft knife along the edge with a little bit of pressure to create a smooth rim.

Step 5: Repeat step 4 until you have covered the whole area.


Tip: Use Smart Edges to create an even tidier finish to your splashback.

Full Video Tutorial
Check out our full video tutorial on how we installed the tiles in this 30 year old caravan and gave it a modern look.
FAQ
How long will it take to install the tiles?
This completely depends on the style of tiles and the area you intend to cover.
If the tiles have a challenging pattern with many overlapping grouts, it will take a bit longer. Same goes for your choice of space. Windows and other objects can make it a bit more fidgety to apply it around.
But do not get discouraged! It took us about 2 ½ hours and we had both a challenging tile design and area.
How much will it cost?
This depends on how big the space is you are going to transform. The bigger the space, the more tiles you need. We needed a 12-Pack of tiles which cost 119$ but had some off cuts left over.
How do I clean the tiles?
Restore the shine of your tiles by wiping them with a sponge and a mild non-abrasive household cleaning product like a dish soap or glass cleaner. Pay attention when using some spices with high density pigment colour, such as curry, as they can stain the tile permanently.
Are the tiles heat resistant?
The tiles take 48 hours to completely bond with the surface. After that they are heat resistant to the heat of a stove. Always double check your manufacturer's instructions that came with your stove, before installing Smart Tiles. It is recommended to prevent direct exposure to an open flame. We recommend that you read our full FAQ page for further details about installation distances to different heat sources.
How can I select the best design for my space?
A rule of thumb is: the smaller the space, the bigger it looks with more details. So choose a smaller tile if you want to give the illusion of a bigger space. However; too much detail can become overpowering on a big wall. In that case, use a big, simple design from our store.
If you are unsure on what to get, order some samples to figure out what works best for you. And, as always, don’t hesitate to ask us for help!
How can I work out the m2?
When you have a look at our website, you will see that every pack of tiles tells you the amount of square meters it will cover. To calculate the amount required simply just use our helpful calculator.

How durable are the tiles?
Smart Tiles® will stick to your walls for as long as you wish them to. They will not crack or become yellow.
You can find more answers here.