
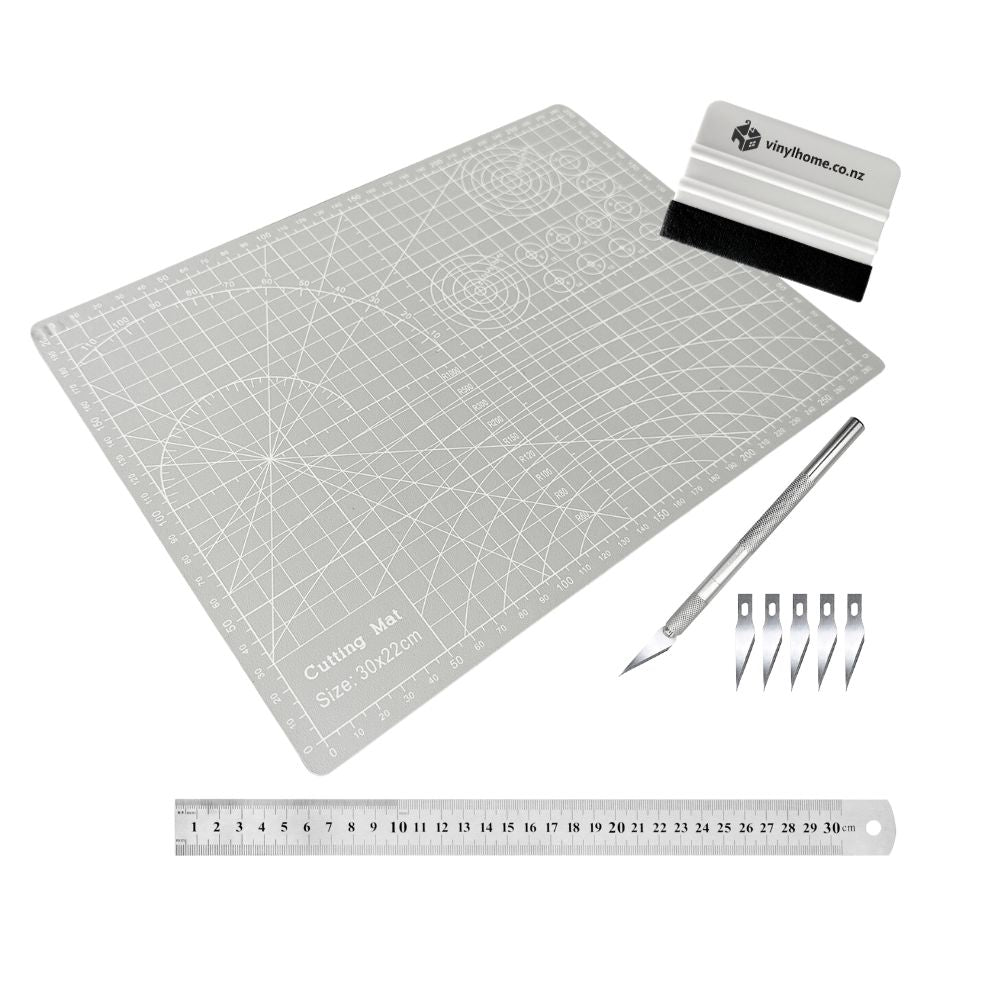
To cut and apply the film you will need the following items:
-scissors
-pen
-ruler
-sharp knife (e.g. craft knife or similar)
-squeegee
-a clean cloth
- a hair dryer or heat cun to shape the vinyl or wrap around small edges.
FREE NZ delivery over $199, AUSTRALIA: from NZ$15.

> Wall tiles samples are now sold as single sheet
> 50% OFF small samples until sold out
Vinyl Wallpapers are now sold as sample packs
Bundle Deals - Tools
Get all the tools you need for your DIY vinyl installation. Buy & Save with our tool bundle deals.

Edge Trims for Wall Tiles
Complete your self-adhesive wall tiling job with smart accessories.

Vinyl Home -Gift Card
Shopping for someone else? Treat them with a DIY gift card and let them select their favourite the design.
Equip yourself with the right tools and take your DIY project to the next level!
CUSTOMERS
Be inspired and become a DIY pro in no time
DIY 101 〉FAQs 〉Order Information | Wall Tiles - Smart Tiles | Wet Room Vinyl Wall Tiles - d-c-fix | Adhesive Vinyl | Window Film | Vinyl Wallpaper
To cut and apply the film you will need the following items:
-scissors
-pen
-ruler
-sharp knife (e.g. craft knife or similar)
-squeegee
-a clean cloth
- a hair dryer or heat cun to shape the vinyl or wrap around small edges.
The film can be applied on almost any clean (dust and grease free) flat surfaces like walls, doors, appliances, furniture, bench tops, cupboards, windows and anything else you can think of. If applied on untreated wood like chipboard or plywood, we suggest you use a sealer or primer on the surface first. If unsure if the vinyl will adhere to the surface it's always best to order a small sample first and try it on the surface.
These surfaces are OK:
-wood
-worktops
-flat glass
-laminate
-flat wall tiles (not the grout)
-laminate
-veneers
-marble
-metal
-painted/plastered walls
-plastic
-mirror
-primed MDF
-Radiator covers
Avoid:
-brick wall
-stone wall
-embossed / bevelled glass
-dirty surfaces
-wet areas e.g showers
-fire surrounds
-damp surfaces
-raw MDF
-radiators
-floors
Place the film in front of you with the printed grid system up. Use the grids for straight lines and mark with a pen your required shape. Allow for about 5cm extra on each side as it may be tricky to place the film exactly where you want it to be. The extra centimetres can easily be cut off with your sharp knife once the film is applied to your chosen surface.
1. Start by placing the film with the backing paper on the surface (the grid system is facing the item and the sticky back plastic pattern is facing you). Make sure that you have an overhang on all edges.
2. Gently peel away a small part of one corner and pull the backing paper slowly downwards. Now place the exposed sticky film on the surface. Don't forget to allow for the overhang. Use your squeegee to smoothen down the film. Start from the centre and work your way out to each side in order to avoid air bubbles.
3. Now the sticky back plastic is stuck to a small part of the surface and won't glide around.Now slowly pull the backing paper with one hand and whilst you smooth the film on to the surface with your cloth or squeegee. This is the tricky part so it pays off to take extra care. If you make a mistake you can easily remove the film and start all over again. The idea is to pull the backing paper as you go and only expose a small part of the sticky back at the time. This is to allow for a smooth and bubble free surface and to avoid the sticky back to stick to unwanted surfaces and tangle.
4. When you are happy with the result, use your sharp knife and gently cut off the overhang.
Click here to view installation video.
Should there be any bubbles after applying the film you can either:
1. gently lift the film until you reach the bubble and start smoothing down the sticky back again using your squeegee; or
2. if close to the edge, try to smooth out the air using your squeegee; or
3. gently pop the bubble with a small sharp needle and smooth out the air through the hole.
For edges we recommend to use a hair dryer for the glue to activate quicker as otherwise it may not stick to thin edges (like cupboard doors, tables, benchtops or similiar). The glue is low tack so it's easy to adjust during application which also means it takes time to bond with the surface. Heat speeds up that process. Check out our installtion videos on how to do this.
Heat the film with a hairdryer on the coolest to medium high setting. Gently smooth the film and press it onto the surface as you warm it. Make sure you don't pull the film too hard whilst it's warm as it may overstretch. We recommend that you try it a few times with a sample or an off cut first until you get the technique right. You may want to use a glove or sock on your hand to protect your fingers from the heat.
Click here to view installation video.
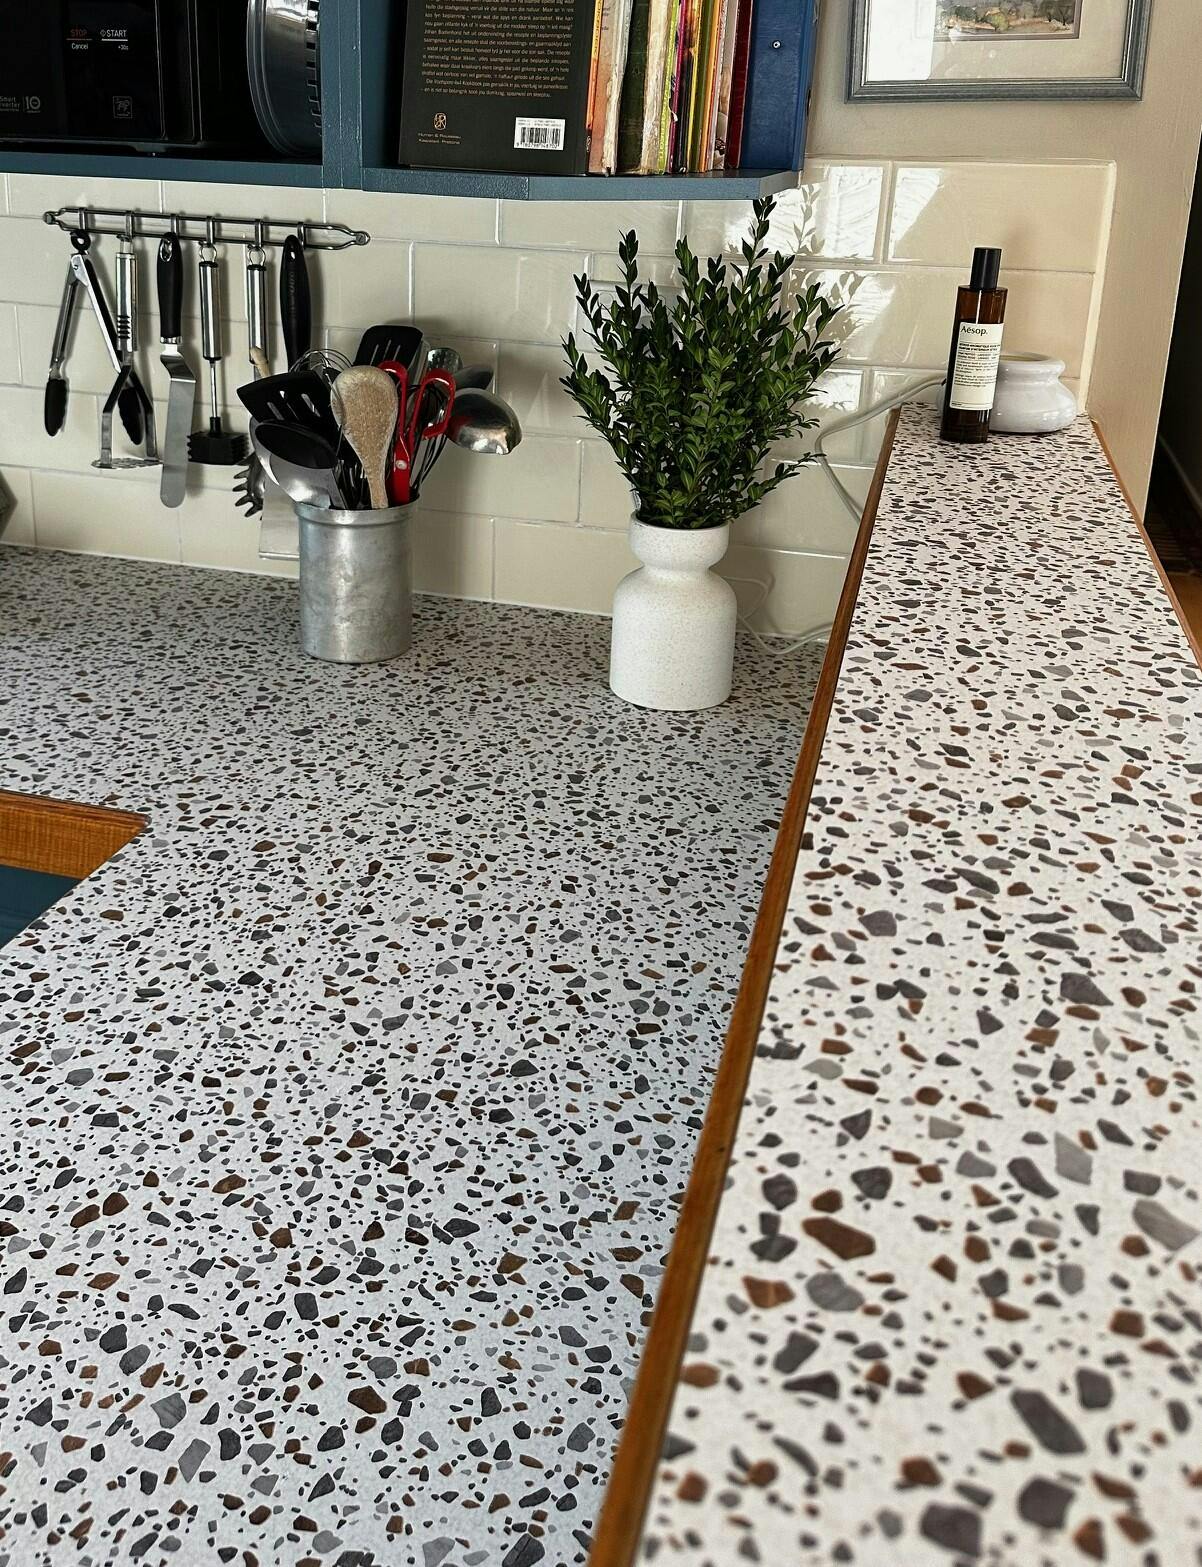
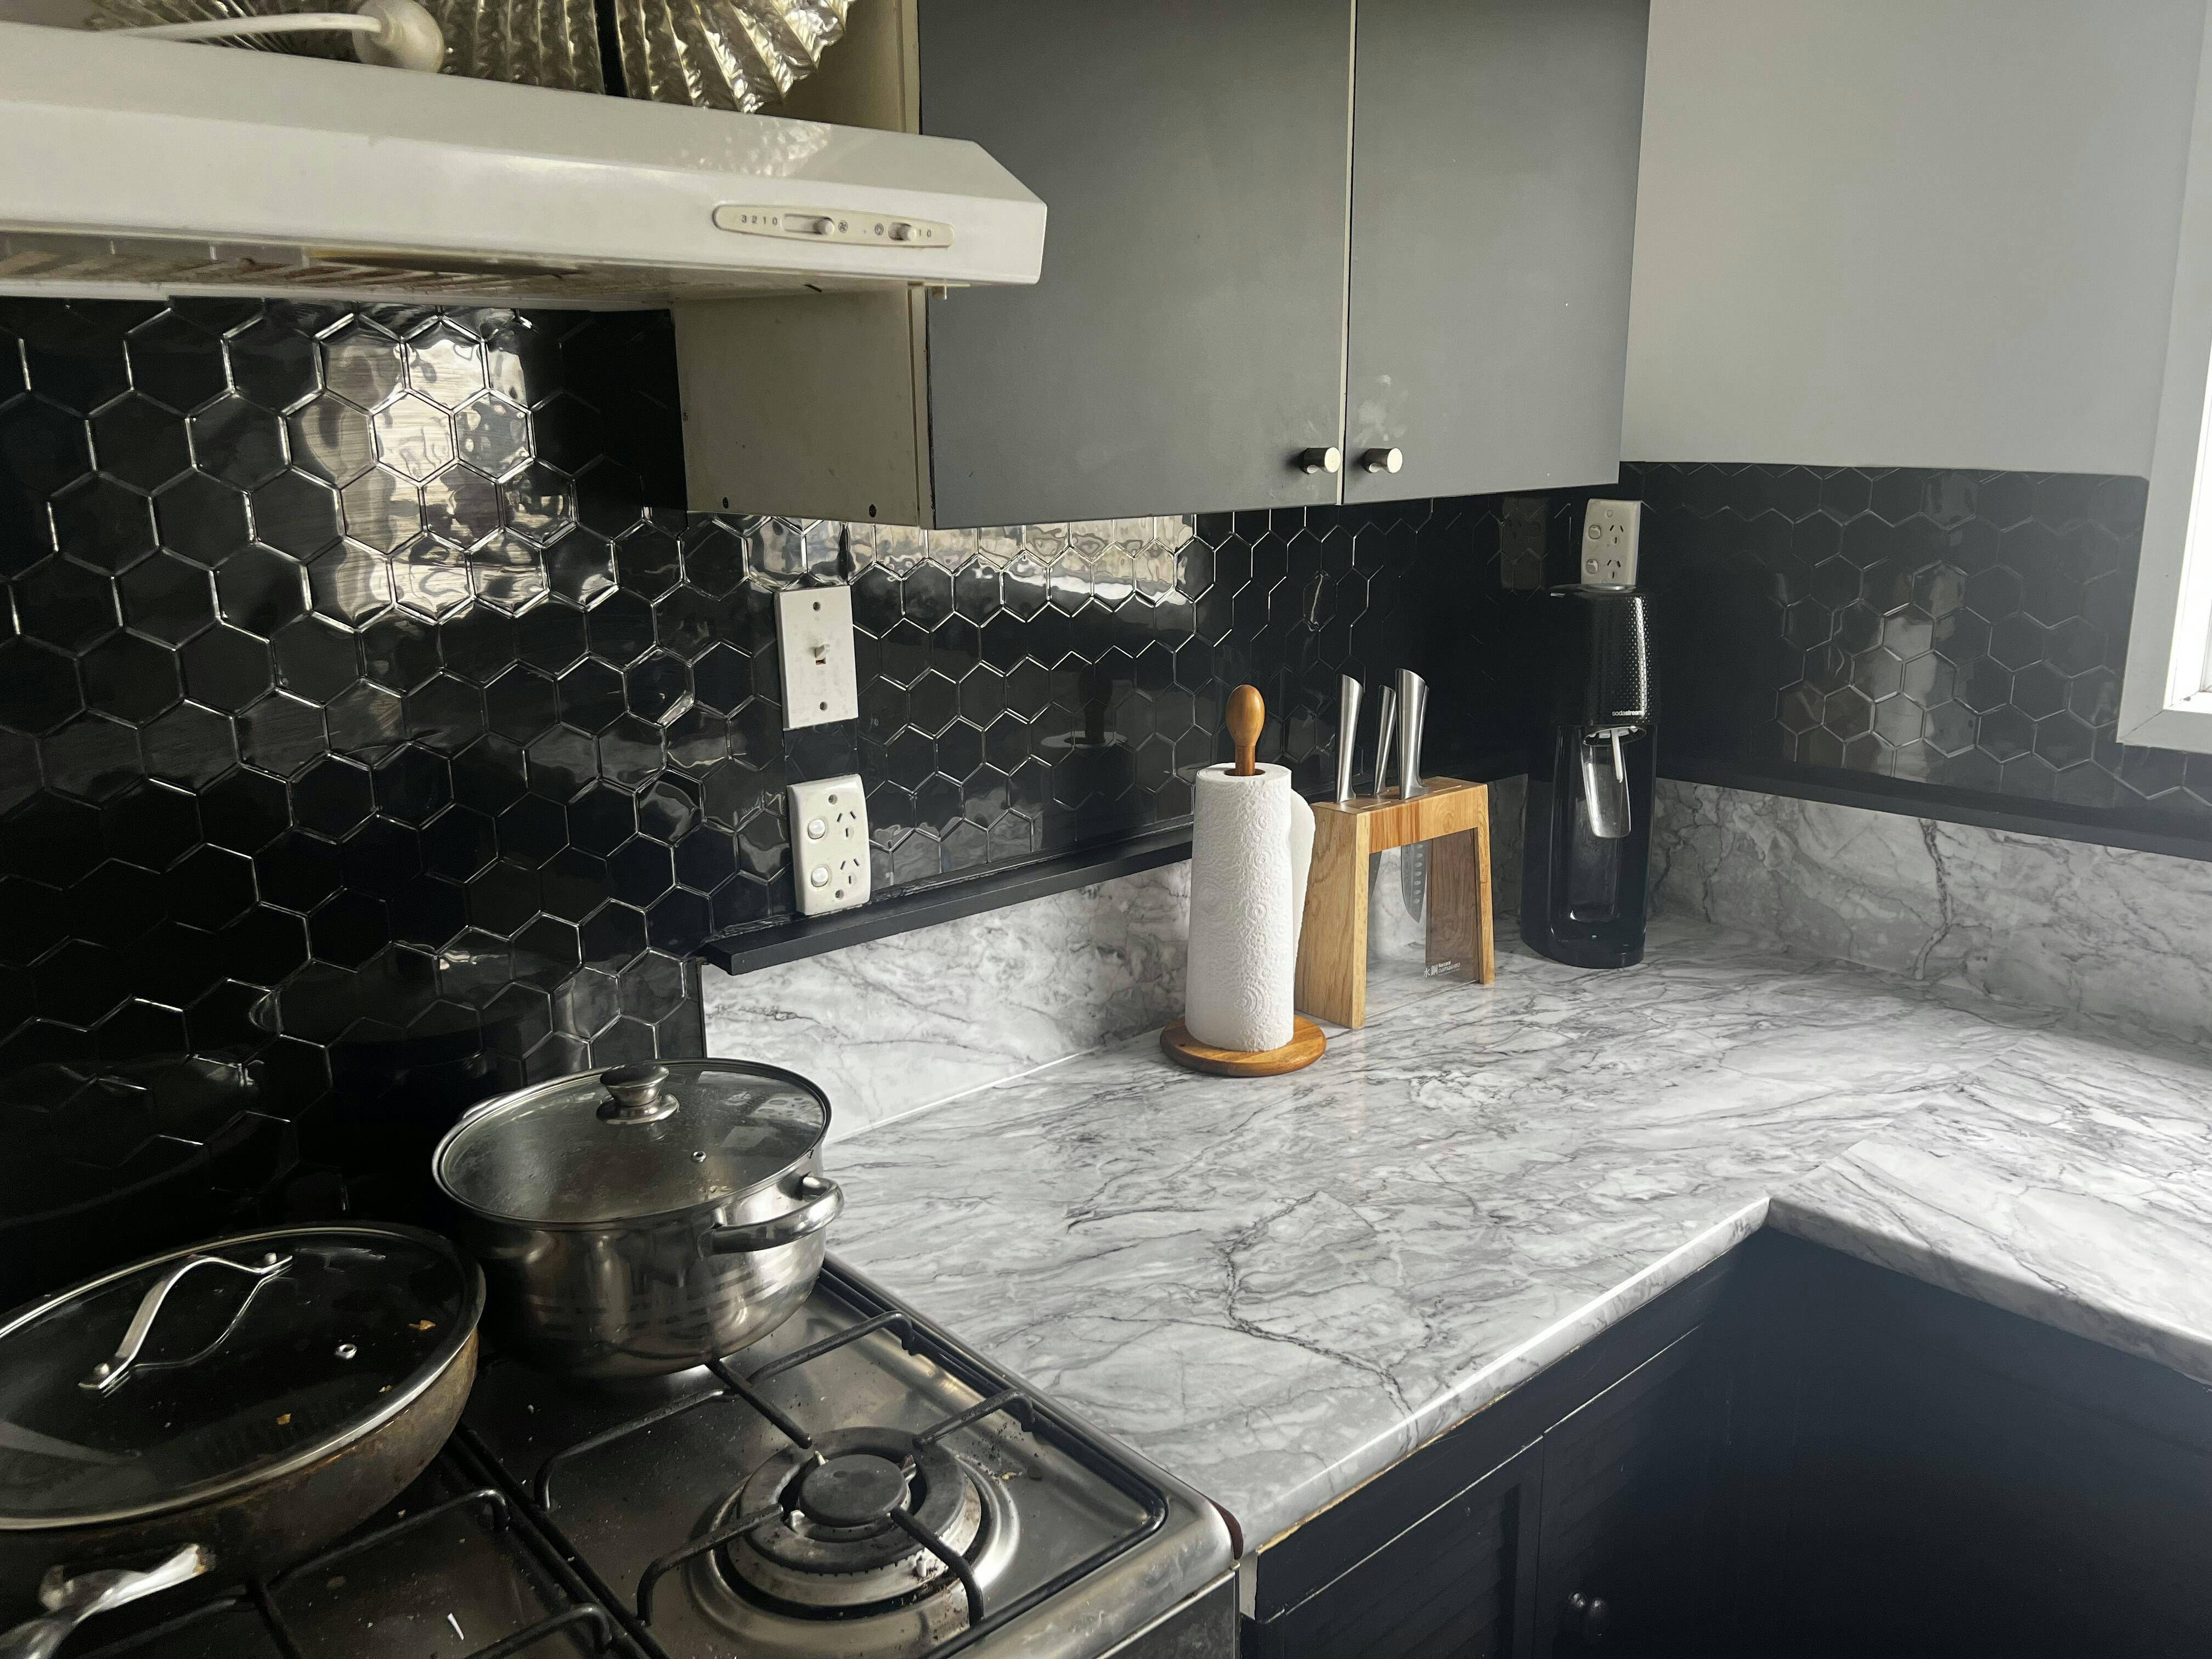
It is always best to use a width of a film that is wider than your intended surface. If your surface is wider than the width of the roll you can use another length next to the first. In every possible way try to place the edge where it's least visible and exposed. Make a 2-5mm overlap (like you do with wallpaper) to avoid that any of the backing surface is exposed. If the edges are likely to be exposed to wet conditions (e.g. in a bathroom or kitchen bench top) or accidentally to be touch very often, it is recommended to use a sealer. Overlaps with wood grain designs are not really visible to the eye. You don't need to think about matching the design. For glossy finishes it's important to try and match the design of the first length for optimal result.
Yes you can. Sticky back plastic can take heat up to 75°C and is both water and alcohol resistant. It's possible to prepare food and bakings directly on the surface and it's easy to wipe clean with a damp cloth. Avoid food with strong colouring like turmeric and curry spices, grinded coffee, food colouring and tomato sauce. They may stain the surfaces in simliar ways they can do to painted surfaces. Treat the vinyl the same way a normal bench top should be treated. This mean don't put anything hot from the stove on the surface (a cuppa is normally fine), use cutting boards at all time and avoid scratching / moving heavy and sharp objects around on the surface.
There are two methods to do this:
1. Cut the vinyl in four pieces and apply around the stove top or sink. Make a small overlap where the pieces meet.
2. Cut a hole for the stove top or sink before you apply it. Make sure that the hole is slightly smaller so that you can trim off excess vinyl and get a perfect finish when applied.
Yes you can. Use a hair dryer to heat up the vinyl so that you can shape it to the shape of the grooves.
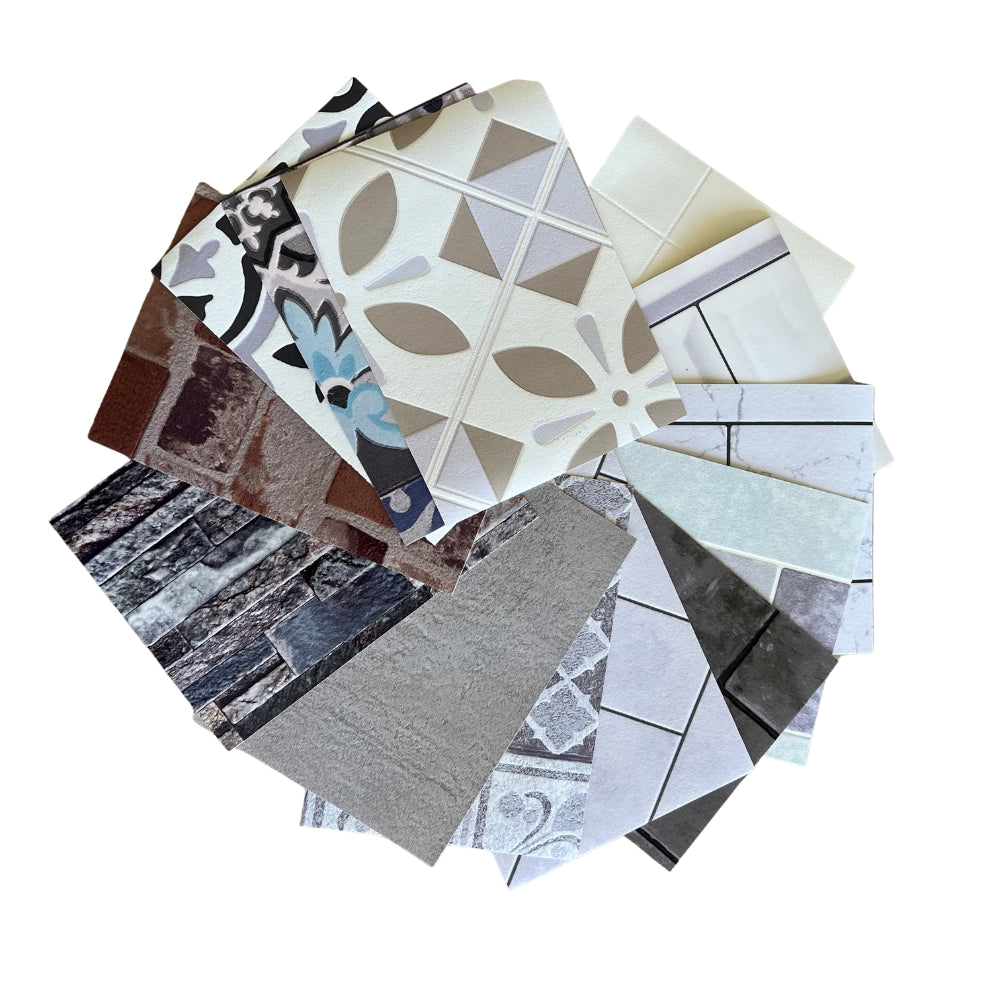
Yes you can order them from here. It is important for us that you are completely satisfied with your film selection and the best way to find out which film is right for you is by viewing and testing it. We take extra care and try to make all our images look as close to the pattern as possible but there might be some variation in reality. Colours may also appear different between different devices. Our sample pieces are 14.5cm x 20cm.
Since all our films are printed there might be a small colour variation between rolls, which is most of the time not noticeable. We recommend you to order all the film you require for the project at the same time to make sure they are sent from the same roll.
Our films are available in 45cm, 67.5cm and 90cm wide rolls.
Our sticky back plastic is available in 2m / 15m rolls. Some patterns are available in 1.5m and 2.1m instead of 2m and 10m instead of 15m.
Our static cling window film is available in 1.5m / 15m rolls. Our sun protection films are available in 2m rolls.
Sorry we can't split any rolls. Our warehouse is not clean enough to keep unwrapped rolls. In some cases you can combine two lengths but it's recommended to use one length wherever possible.
Sorry we can't take any custom orders. All rolls come to us straight from the manufacturer in standard roll sizes.
We have requested wider rolls and medium long rolls from our manufacturer. At the moment they don't have any plans for any new roll sizes.
All our films are approximately 0.1mm thick which is less than a writing paper.
Yes you can use it in places such as bathrooms, kitchen and laundry. We highly recommend that you seal the edges with silicone for extra protection.
Although the product's purpose is for an indoor environment it can be used outdoor as well. Due to weather exposure from sun, wind and rain the expected life time is approximately one to three years. The material may fade and become brittle by time and it could potential lift from the surface if the edges are exposed to too much wetness. We recommend you to seal the edges if this is the case.
d-c-fix® sticky back plastic can comfortably take temperatures between -10°C and 40°C and up to 75°C for shorter periods of time.
d-c-fix® can be cleaned with the most common non-abrasive cleaning products. We recommend you to clean the film with soapy water. Avoid using cleaning products containing chlorine that can bleach or discolour the vinyl.
d-c-fix® is made of pvc and is therefore not fire safe, just like other plastic products.
d-c-fix® is made of pvc, monomeric calendered film. The adhesive is water based acrylic and solvent free. The backing paper is 60 g/m2 printed with a grid of centimeters
d-c-fix® is manufactured in Germany.
The d-c-fix® brand has been around since 1958. They have a long success story and are the global leader on the market.
The d-c-fix® adhesive is solvent-free. It is free from heavy metals and is printed with water based ink. It is light fast to DIN EN ISO 105-B02 and abrasion and scouring resistant to DIN EN ISO 105-X12. If used as specified, it is even safe in children's room.
The backside colour of the sticky back plastic is usually white for the lighter vinyl (e.g. wood grain designs) and black for the darker vinyl. They are always single coloured. However if you intend to apply the sticky back plastic up on your windows the design might show through if it's in the light. Please note that black vinyl always have a black backside and white vinyl a white backside.
1. Measure the width of the surface including the edges you would like to cover. Add 6-8cm for the excess trim. This determines the width of the roll you require (eg 54cm wide surface + 8cm = 62cm. Use a 67.5cm roll)
2. Measure the length of all surfaces and add 8cm for each surface. This determines how many meters you need.
3. The standard sizes of the rolls are 2m and 15m. It is best to use one length for each surface. If you need to add two pieces then our wood grain designs will hide the joins the best.
Here is a general guide of approximately how much vinyl the most common projects require:
Appliance: 2m/1.5m x 67.5cm
Fridge, dishwasher, washing machine
Bathroom Vanity: 2 x 45cm x 2m
Small single vanity with two doors and two side panels
Bench top: 67.5cm x 2m
Standard bench top 1.8m long x 60cm wide
Chest of Drawers: 3 x 45cm x 2m
3 large drawers outside dimensions max D: 40cm, H: 90cm, W: 90cm
Dining Table: 90cm x 2.1m
1.8m/2m long and up to 85cm wide
Kitchen Cupboards: 67.5cm x 15m
Medium sized: 2 tall cupboards, 6 small cupboards and 3 side panels and kick-boards
Start by gently pulling one corner as if you were removing a sticker. The process is easier if the film is heated with a hairdryer on its coolest setting. Any adhesive residue can be removed with ethanol or warm soapy water. The vinyl will come off fine most of the time without damaging the surface or leaving any marks behind. If the surface wasn't flat (e.g flaky paint), consist of particle board, paper, or paint that had not properly cured you may find that the some of the surface may come off.
Click here to view a video tutorial.
After a minor hiccup with my order I am stoked with my tiles. Colour is accurate when compared to online colour. Good instructions for when I start my project.
Excellent company to deal with.
Loved being able purchase a wide range of samples to help Ilya make a decision
This product is a lot more durable than I imagined it would be.
Not having used vinyl before and my only reference being wrapping my school books with dc fix, I am glad I ended up buying the 15m as I had to take off and redo the first bench I did. Once I got the hang of it, it went fairly smooth with the stove and basin obviously being the trickiest bits to wrap around.
I could overlay the seams as the pattern is very forgiving and you can only see it when the sun shines directly on it.
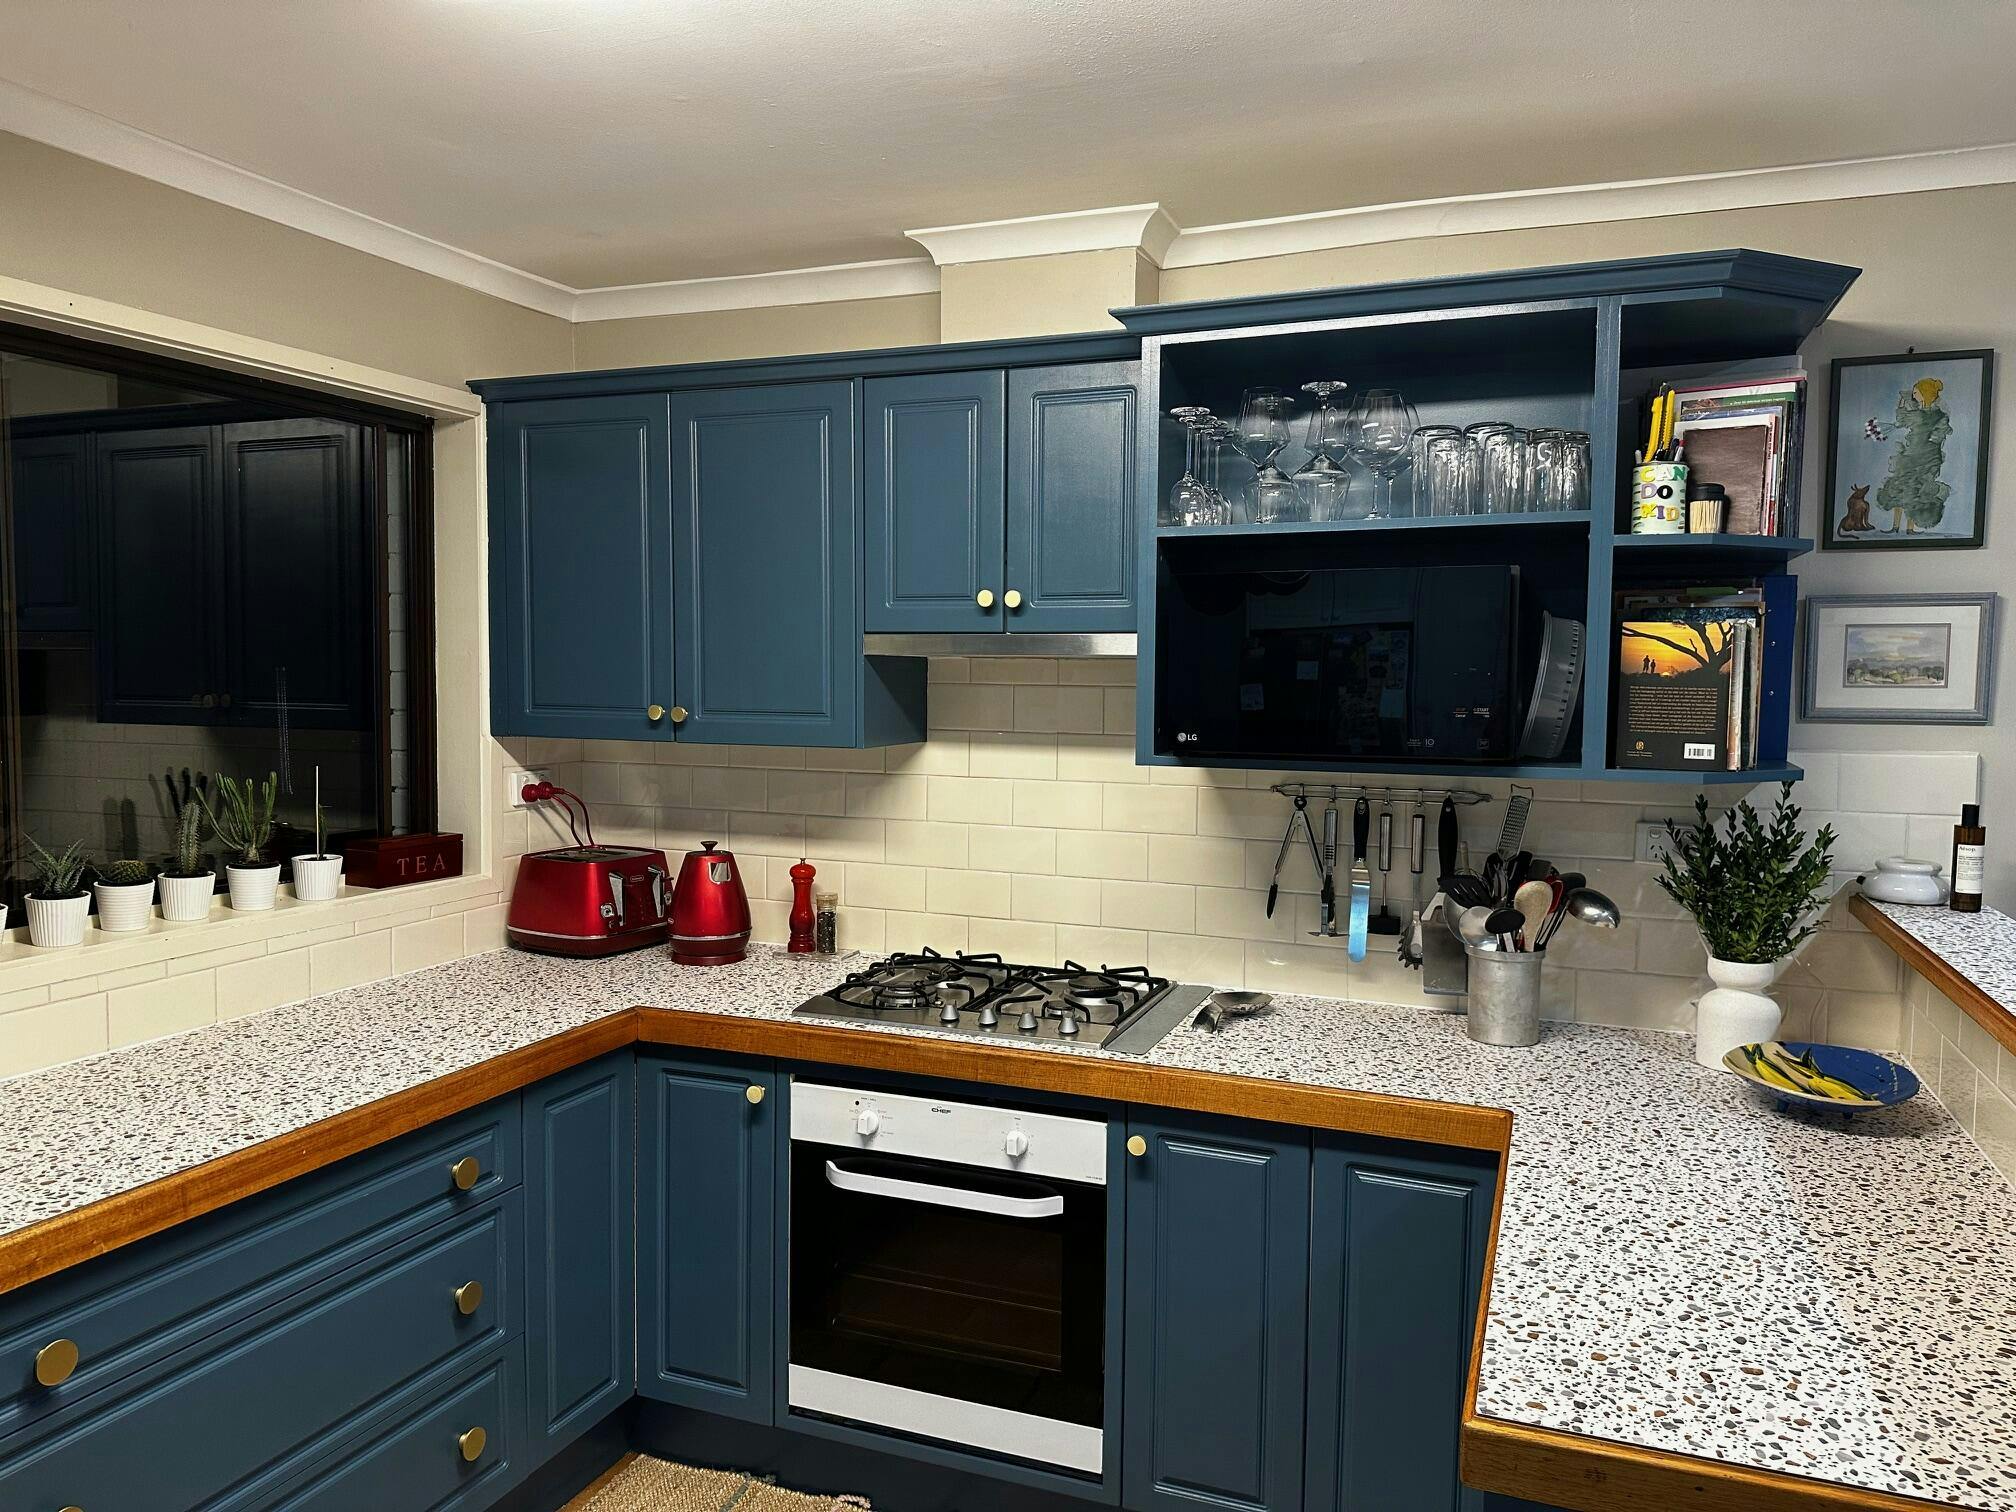
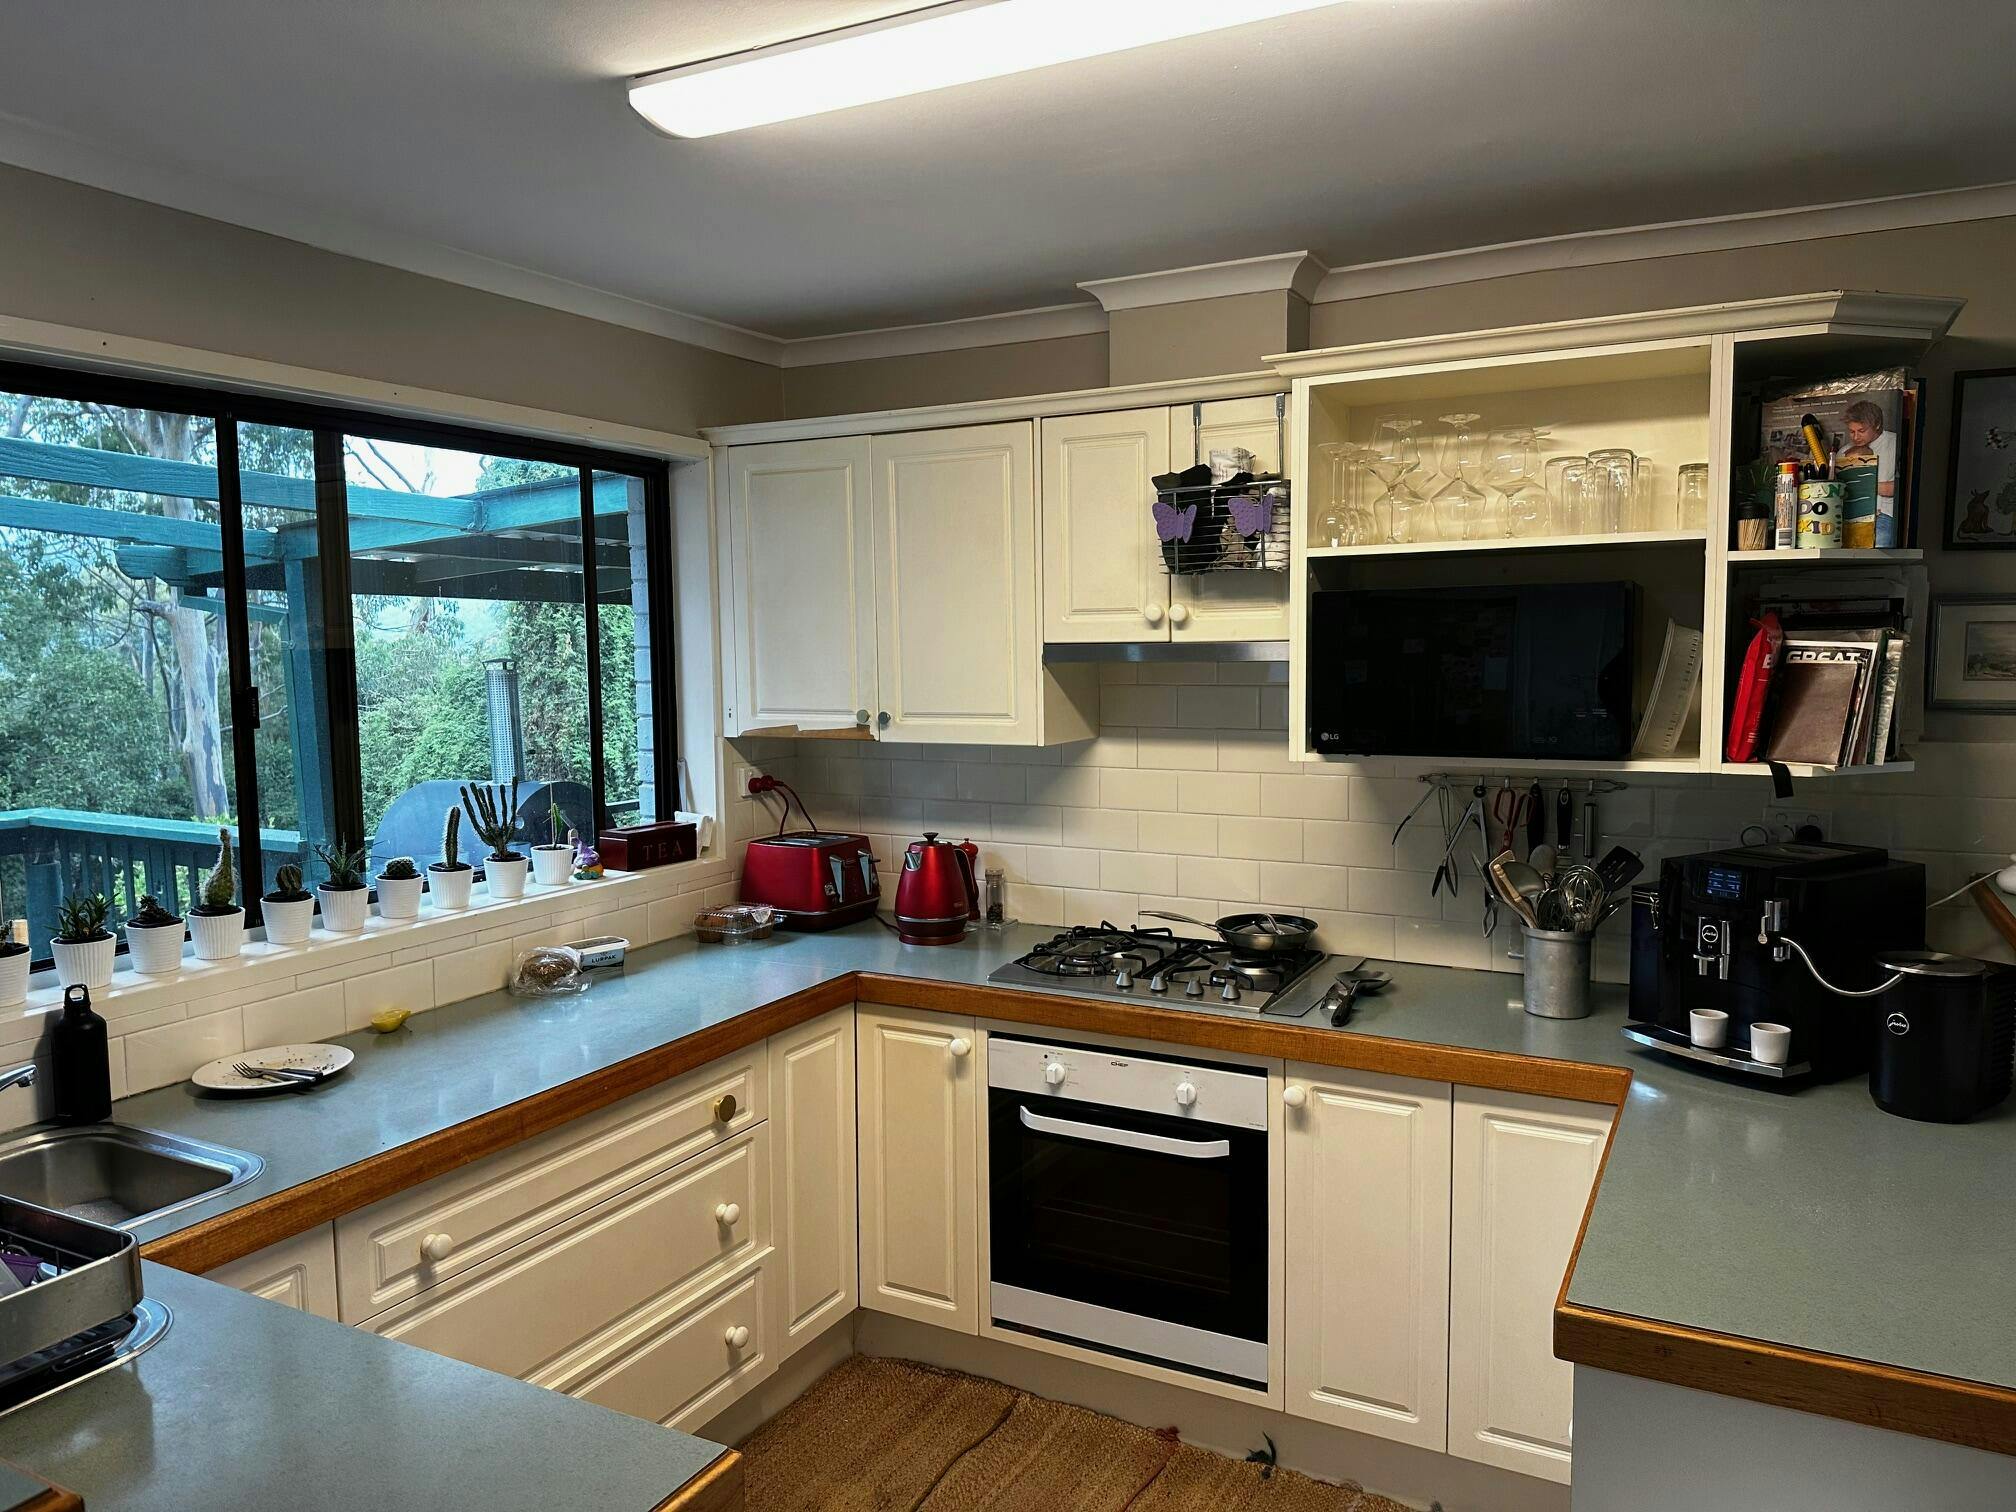
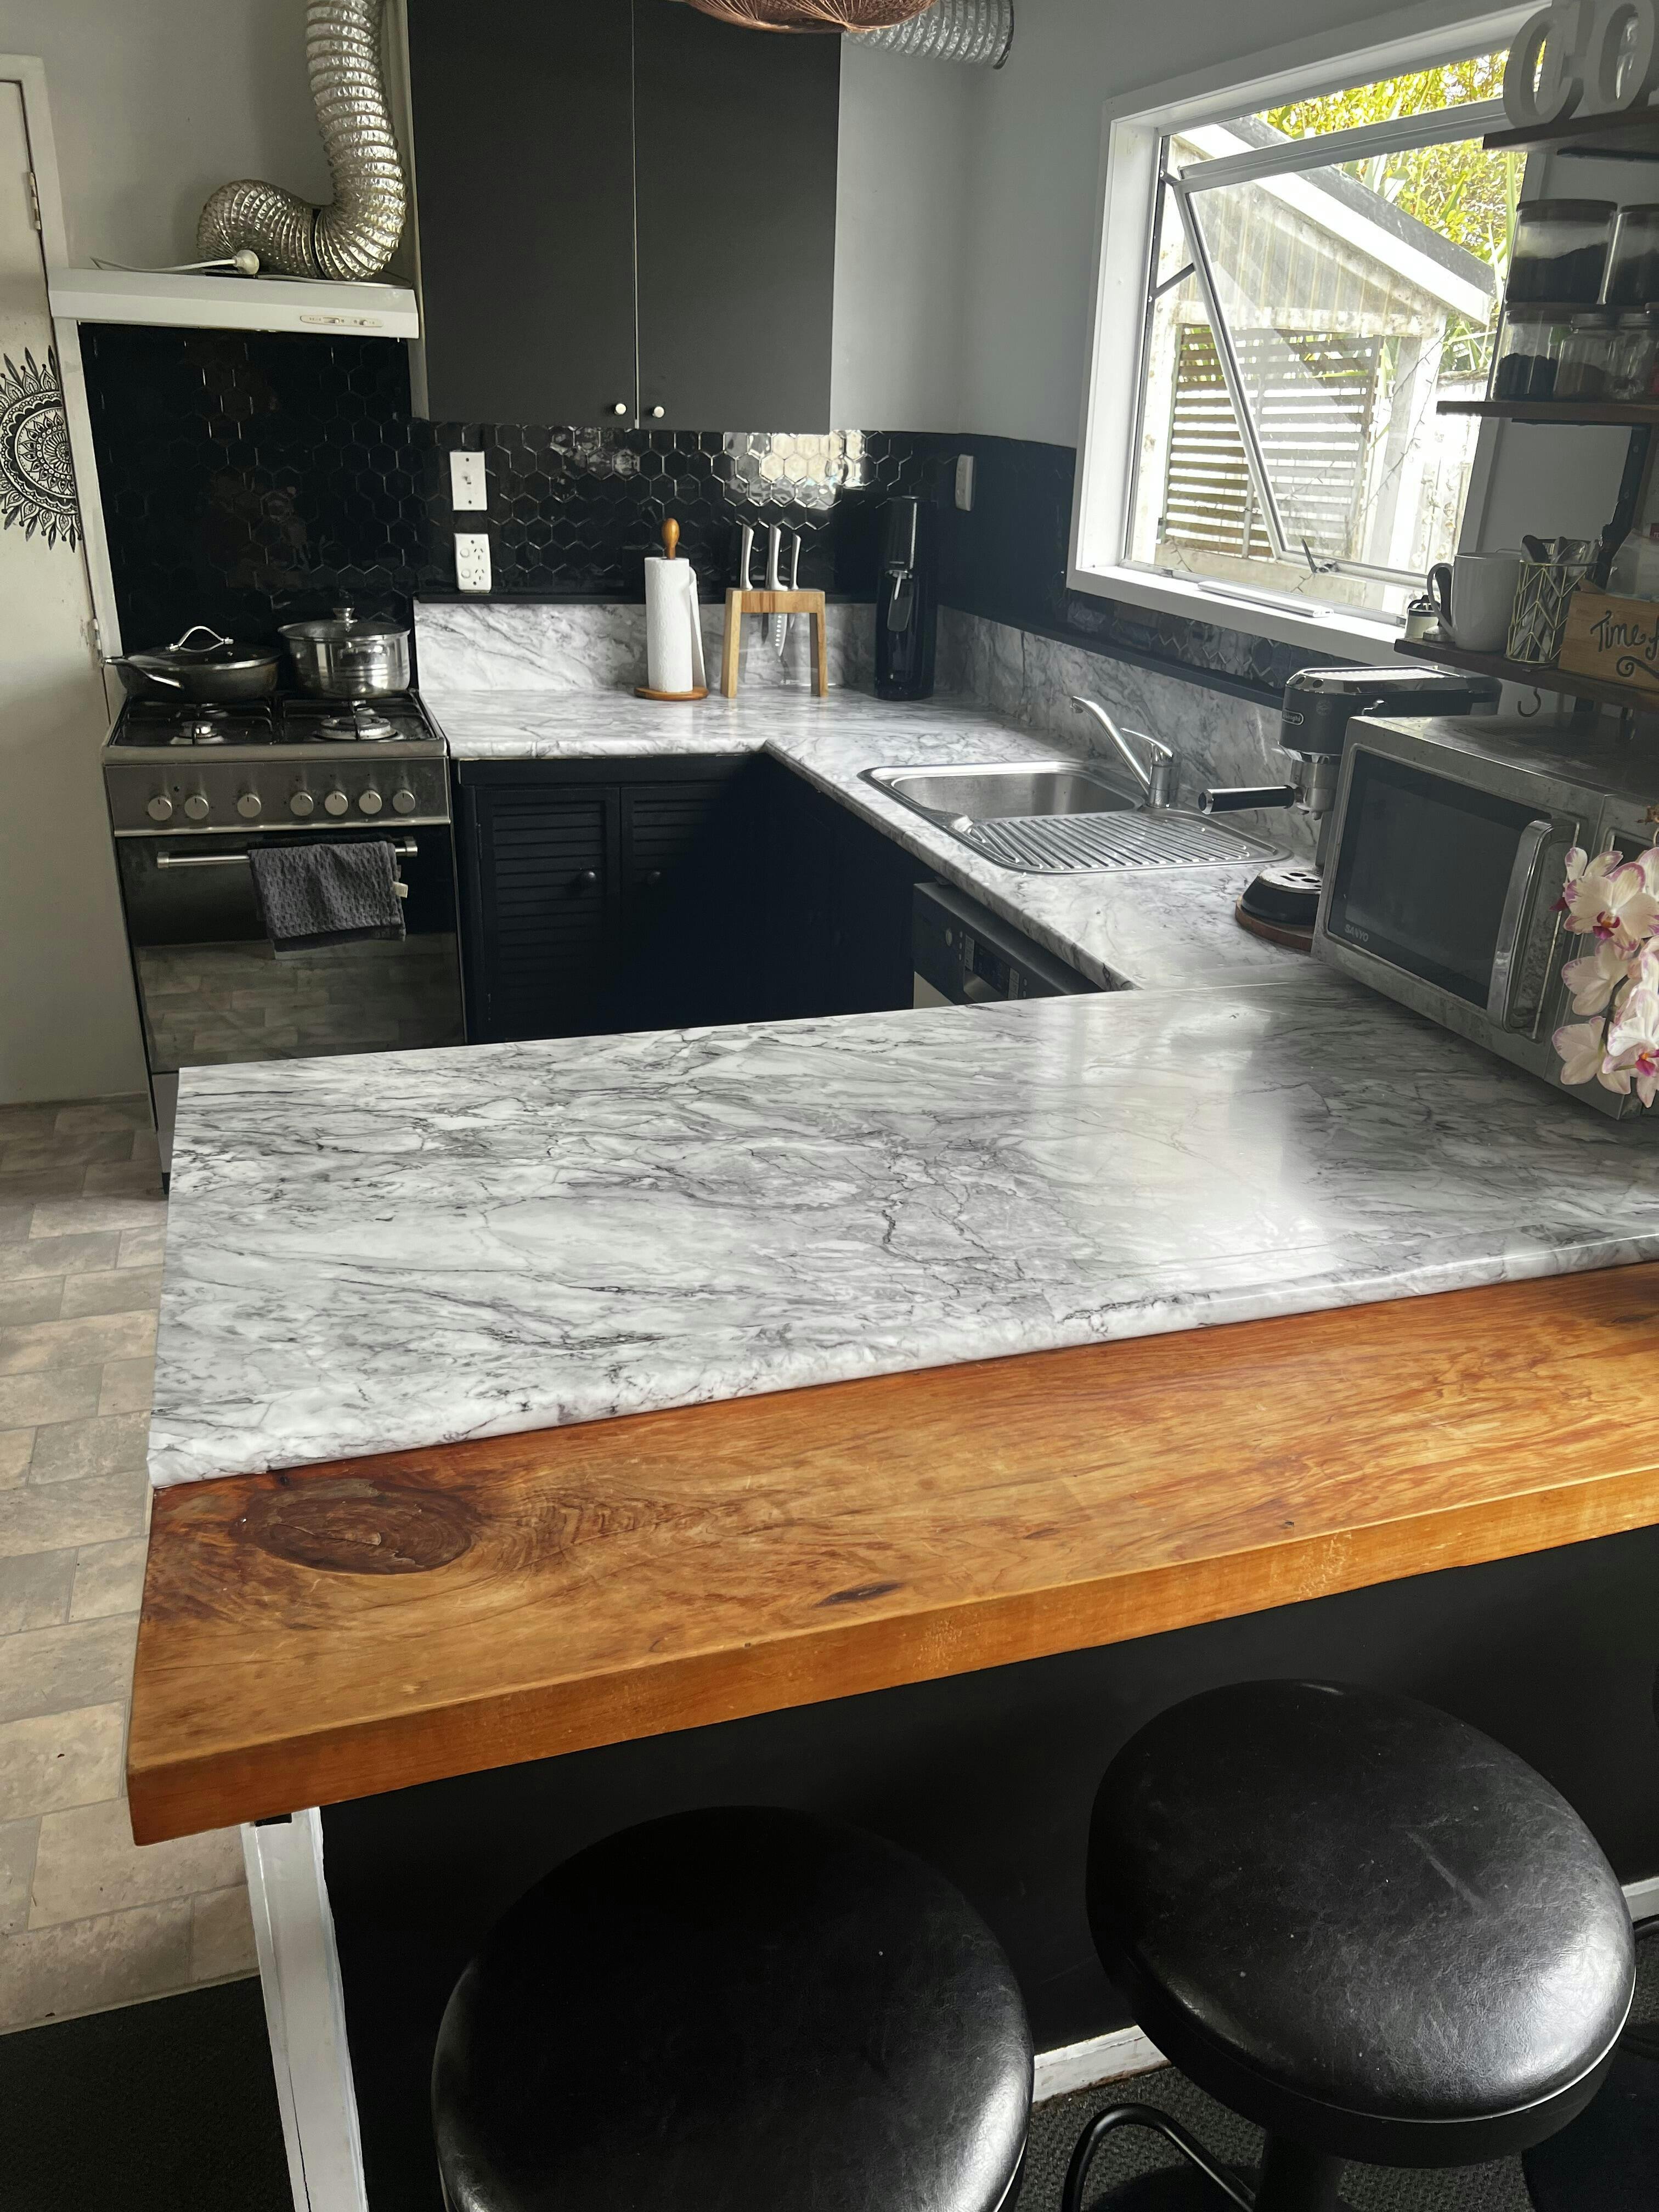
I am very happy with the quality of the product and certainly with the end result as this would have costs thousands if we had replaced the benchtops.
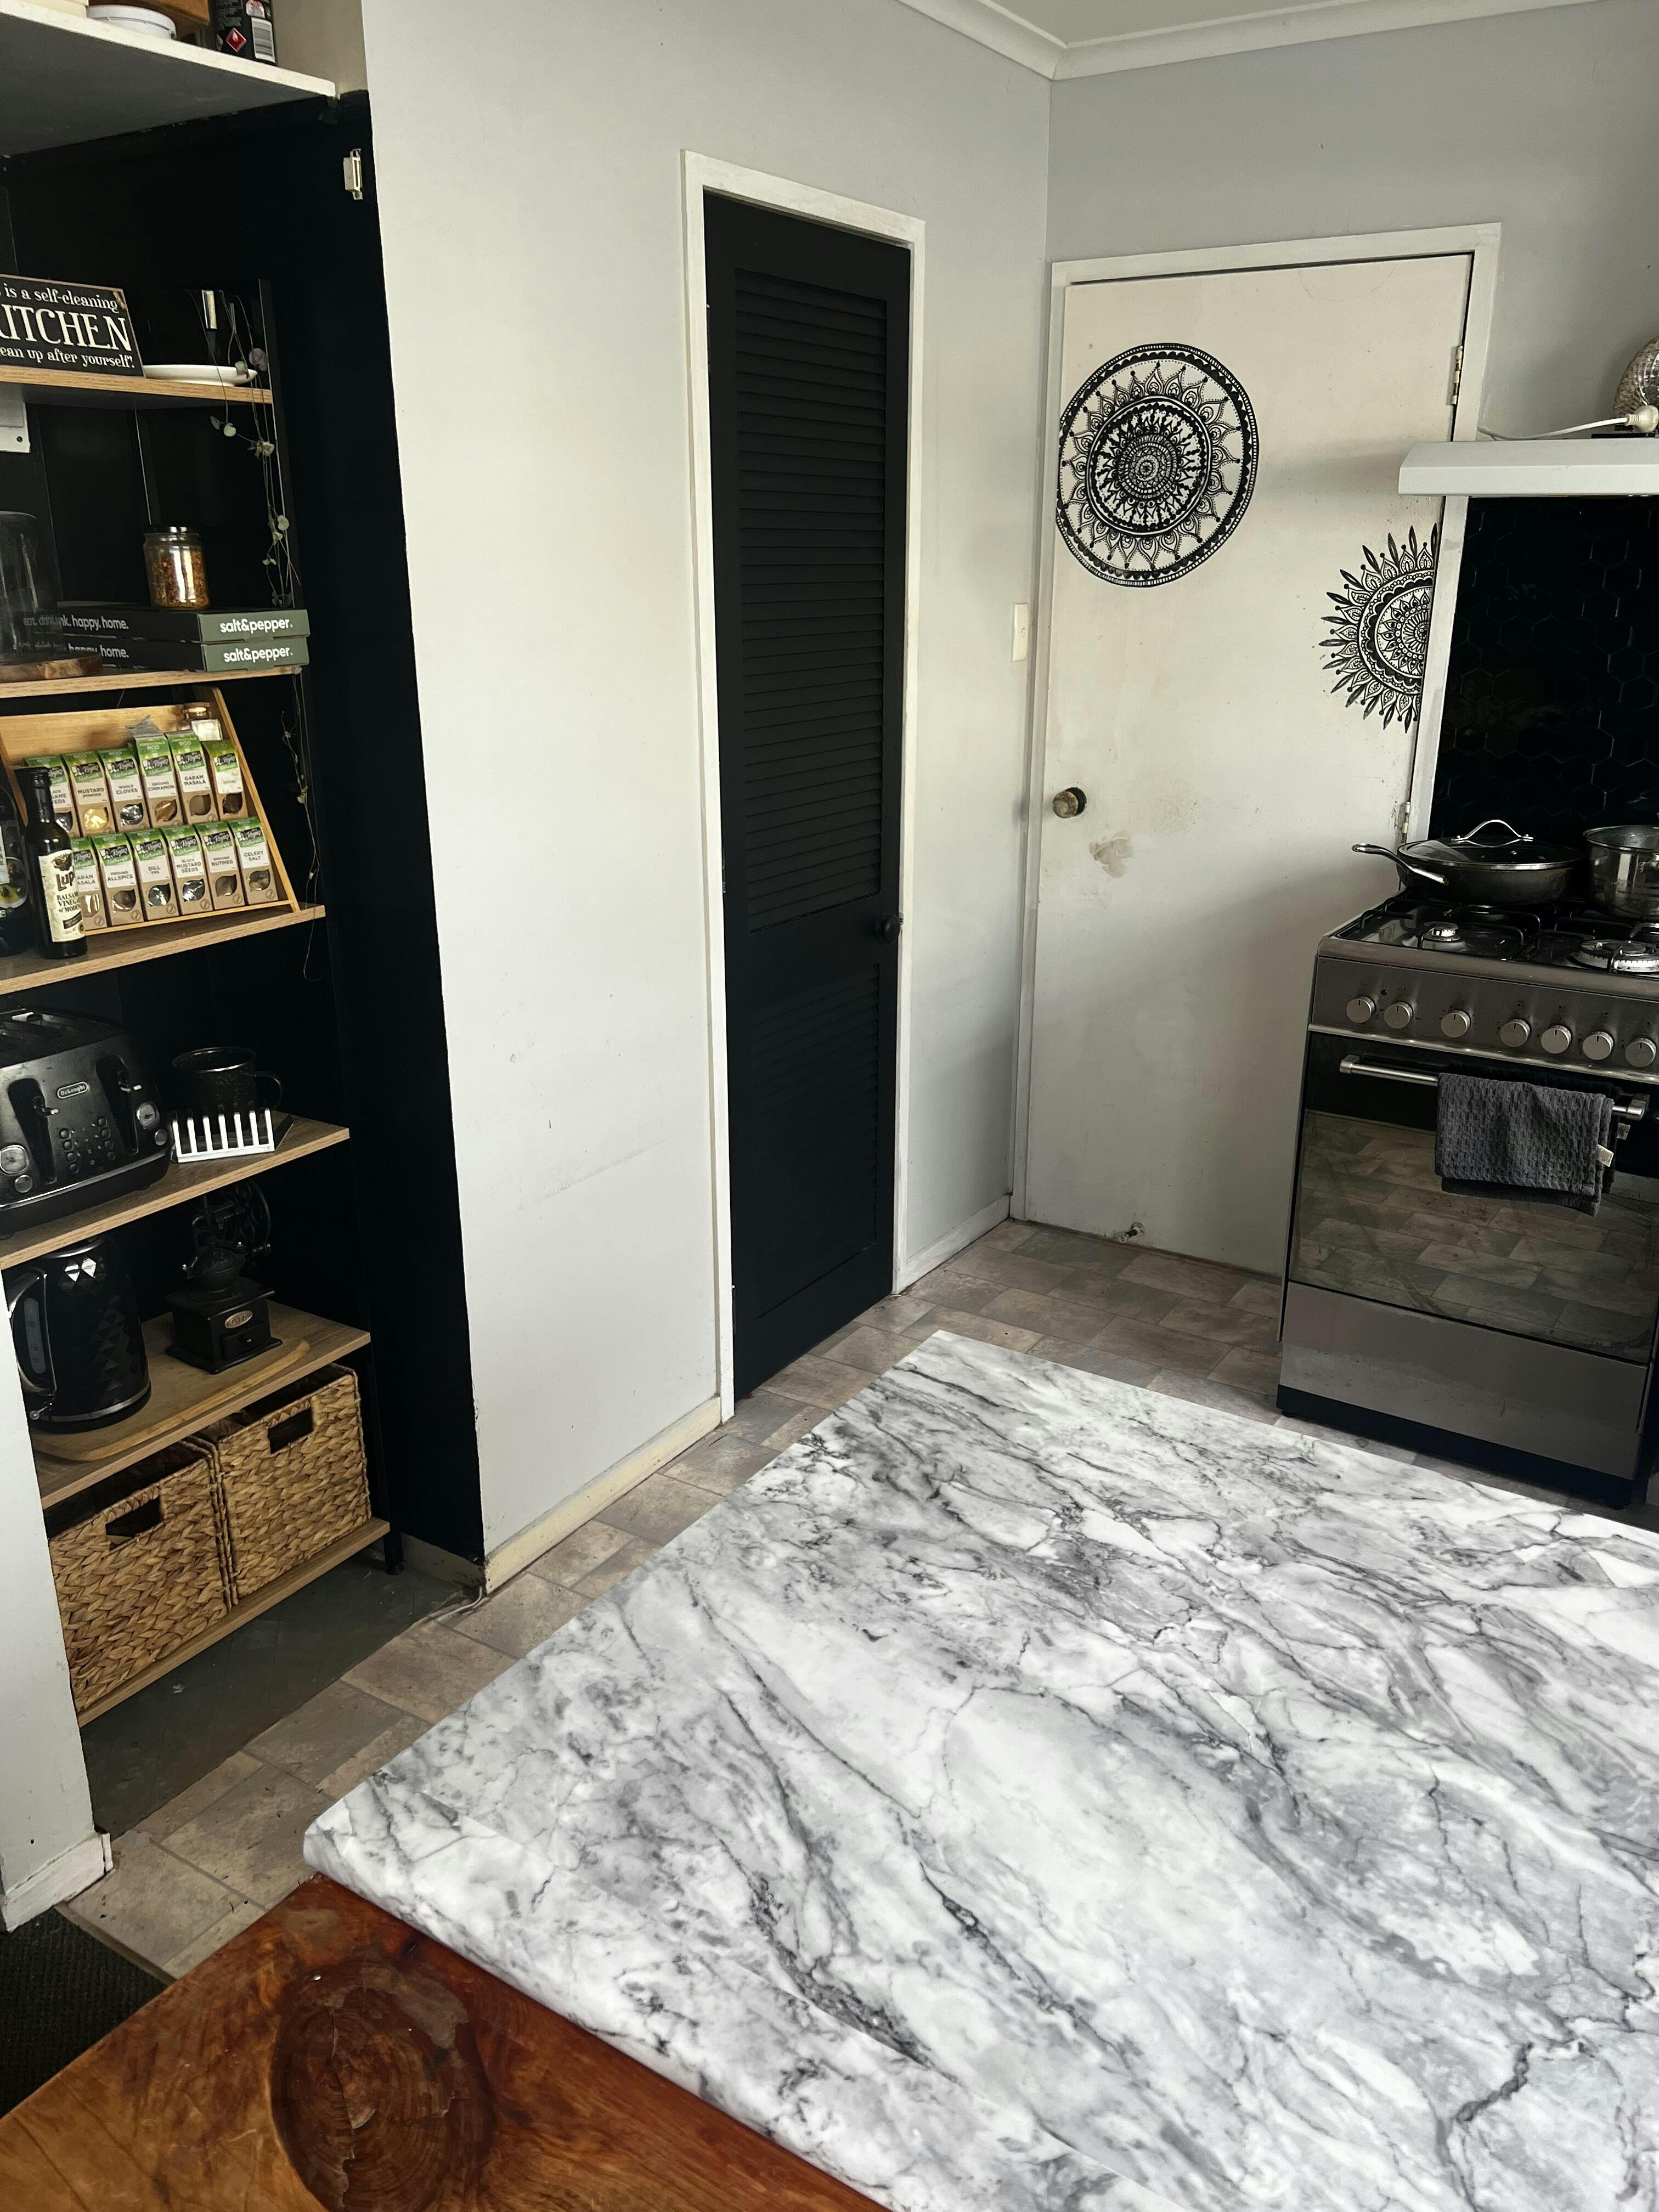
I used the marble Romeo adhesive vinyl on my kitchen benches.
It turned out amazing! and it was so easy to use.
Very good quality and I would highly recommend
I will also be purchasing more in the future when I’m ready to change the look of my kitchen again.
I used the marble look vinyl on my kitchen benchtop. I covered the whole L shape benchtop and all around the sink and everything. It turned out amazing and I will be purchasing more designs in the future when I want to change the look again. This was very easy to use and the quality is great.